Getting started with Spotter
In this article you’ll learn the basics of using Spotter, including where you can use it, how it creates answers to your questions, and how you can edit those answers.
For details on recently added Spotter capabilities, see Spotter capabilities.
For information about the capabilities available in each version of Spotter, see Spotter versions.
Where you can use Spotter
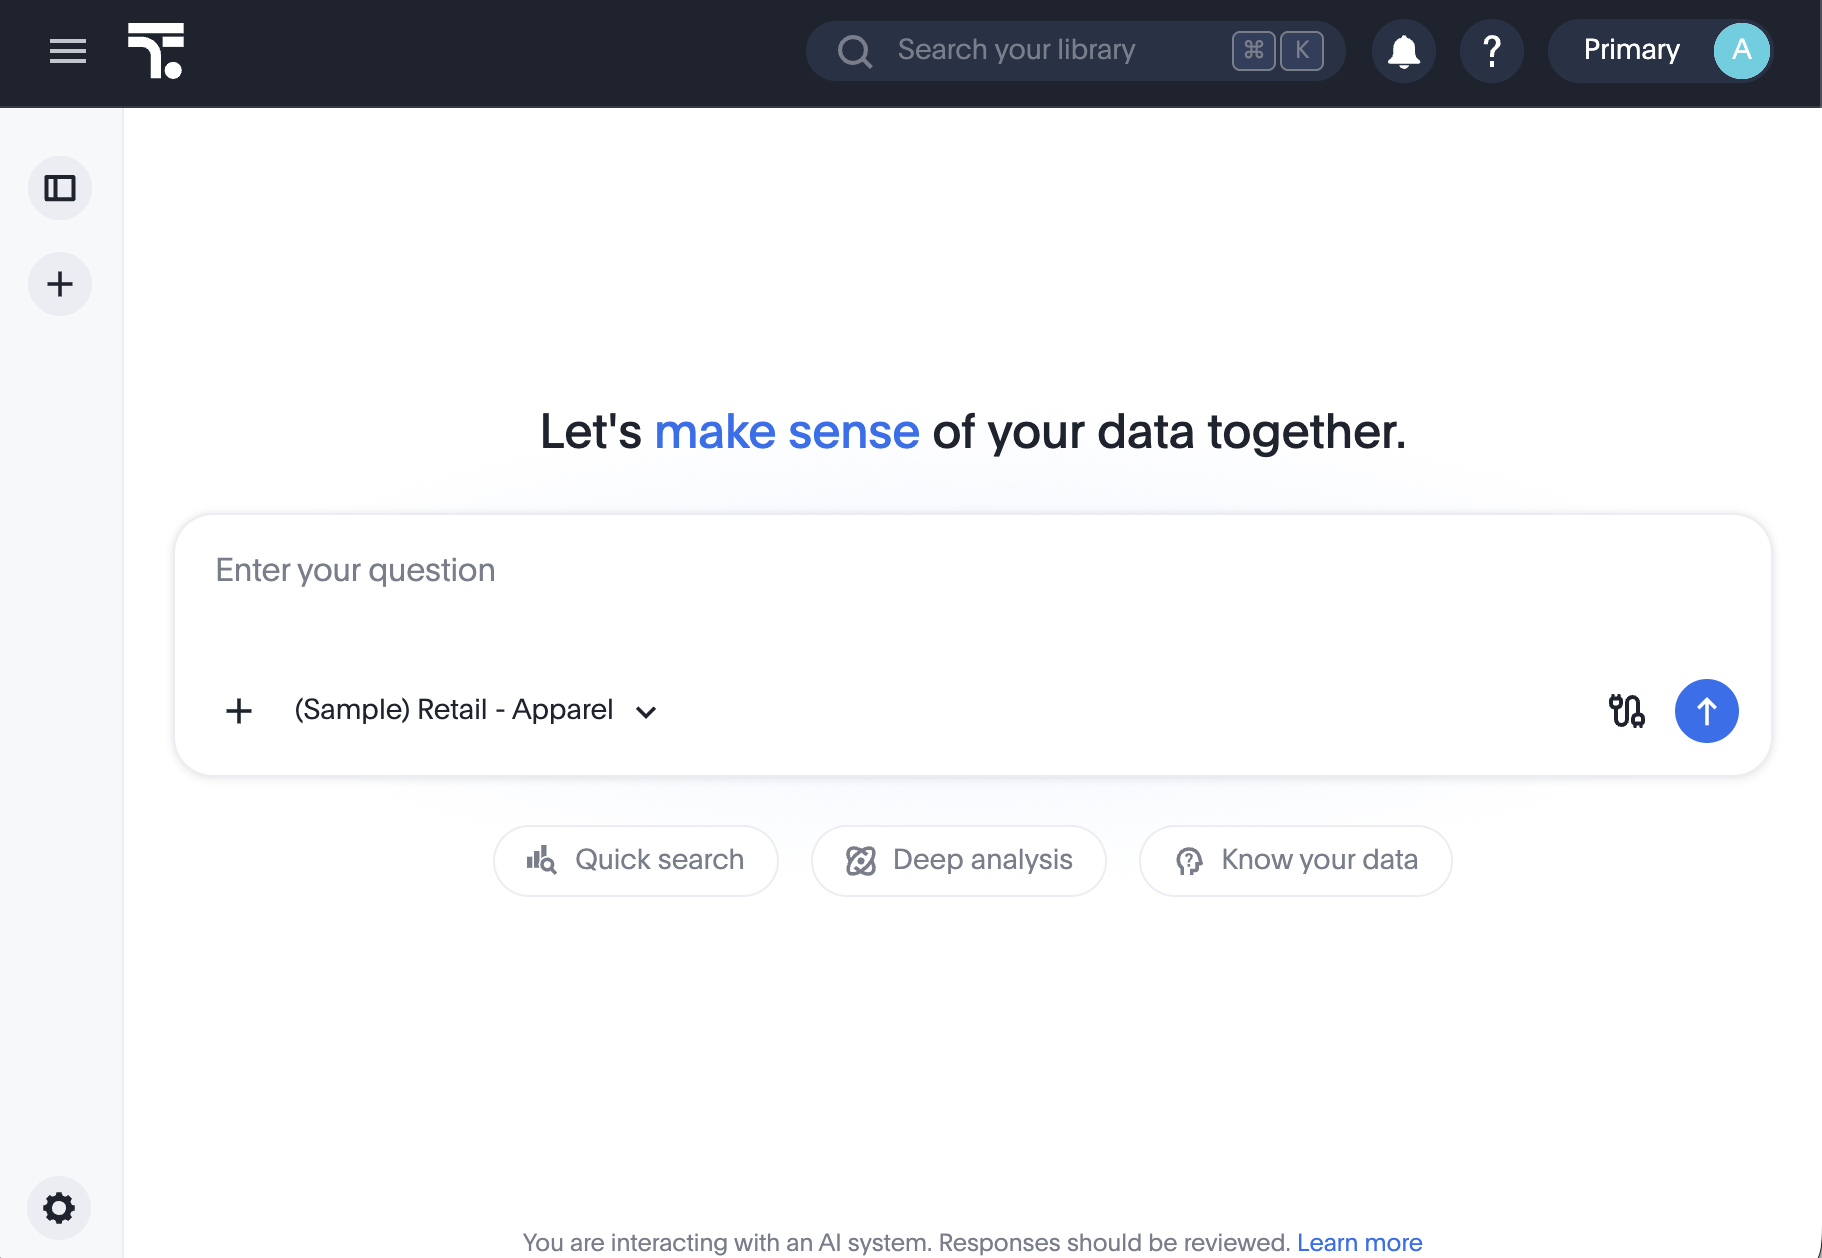
Depending on how Spotter is enabled, you have the following options for using Spotter:
-
Go to Insights > Home, and ask a question in the Spotter question box at the top of the page.

-
Go to Insights > Spotter, and ask a question.
-
Click the Spotter button when hovering on any visualization pinned to a Liveboard.
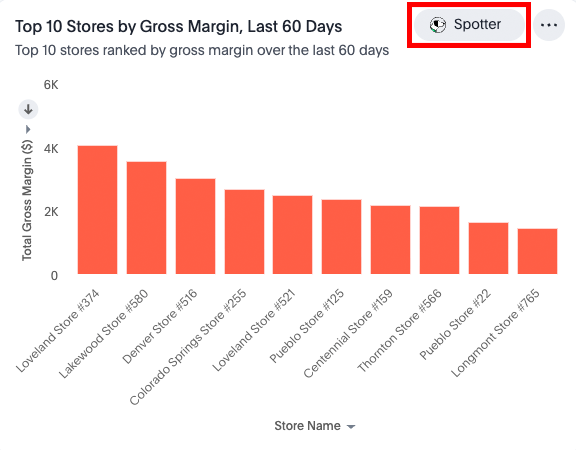
If none of these options is available to you, contact your ThoughtSpot administrator.
How to use Spotter
To ask a question in Spotter, do the following:
-
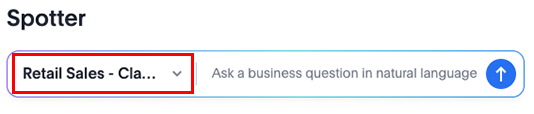
(Optional) If you’re asking from the ThoughtSpot home page or from the Insights > Spotter page, you can select a different data source before you ask your question, or let cross data model search help select the correct data source for the question (if cross data model search is enabled). For more information about cross data model search, see: Cross data model search in Spotter.
-
Enter a question and click the submit button
 , or press the Enter key.
When the question is submitted, the submit button turns into a stop button
 , which you can use to stop Spotter from loading the question, and you can resubmit.
Spotter provides an AI-generated answer to the question.
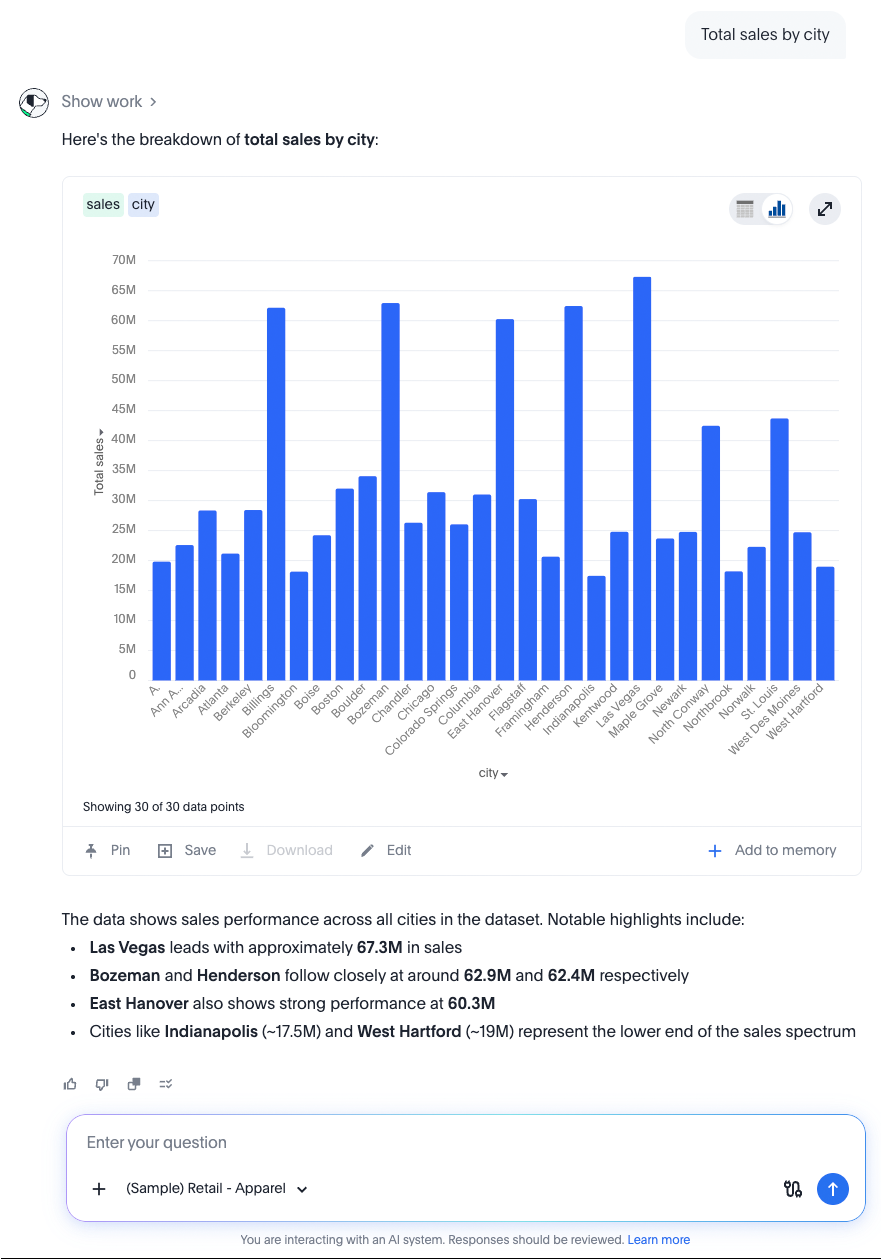
Here are common things you can do with Spotter’s answer:
-
To make changes to the answer, click the Edit button.
For more information, see Understanding a Spotter answer.
-
To switch between chart and table view, click the table/chart toggle button
 .
. -
To download the answer in PNG, XLSX, or CSV format, click Download.
-
To let Spotter know if it got the answer right, do the following:
-
To upvote, click the thumbs-up icon
 .
. -
To downvote, click the thumbs-down icon
 .
.These responses provide feedback to your ThoughtSpot administrator in the Spotter Conversations Liveboard. For more information, see Give feedback on Spotter answers.
-
-
To copy the text summary of the answer, click the copy response icon
 .
. -
To ask Spotter to verify the answer, click the Double check response icon
 .
. -
To save the answer, click the Save button. After you save your answer, you can access it later in the Answers page.
-
To add the answer to Spotter’s memory, click + Add to memory
Spotter treats successive questions in a conversation as a follow-up. You can ask as many follow-up questions as you want.
If you want to ask a question to start a new analysis, click the Reset button. On the home page, Reset lets you start from a fresh question on the selected data source. On a Liveboard, Reset takes you back to the original visualization.
-
For complete details on the elements of the Spotter experience, see [spotter-user-interface].
Understanding a Spotter answer
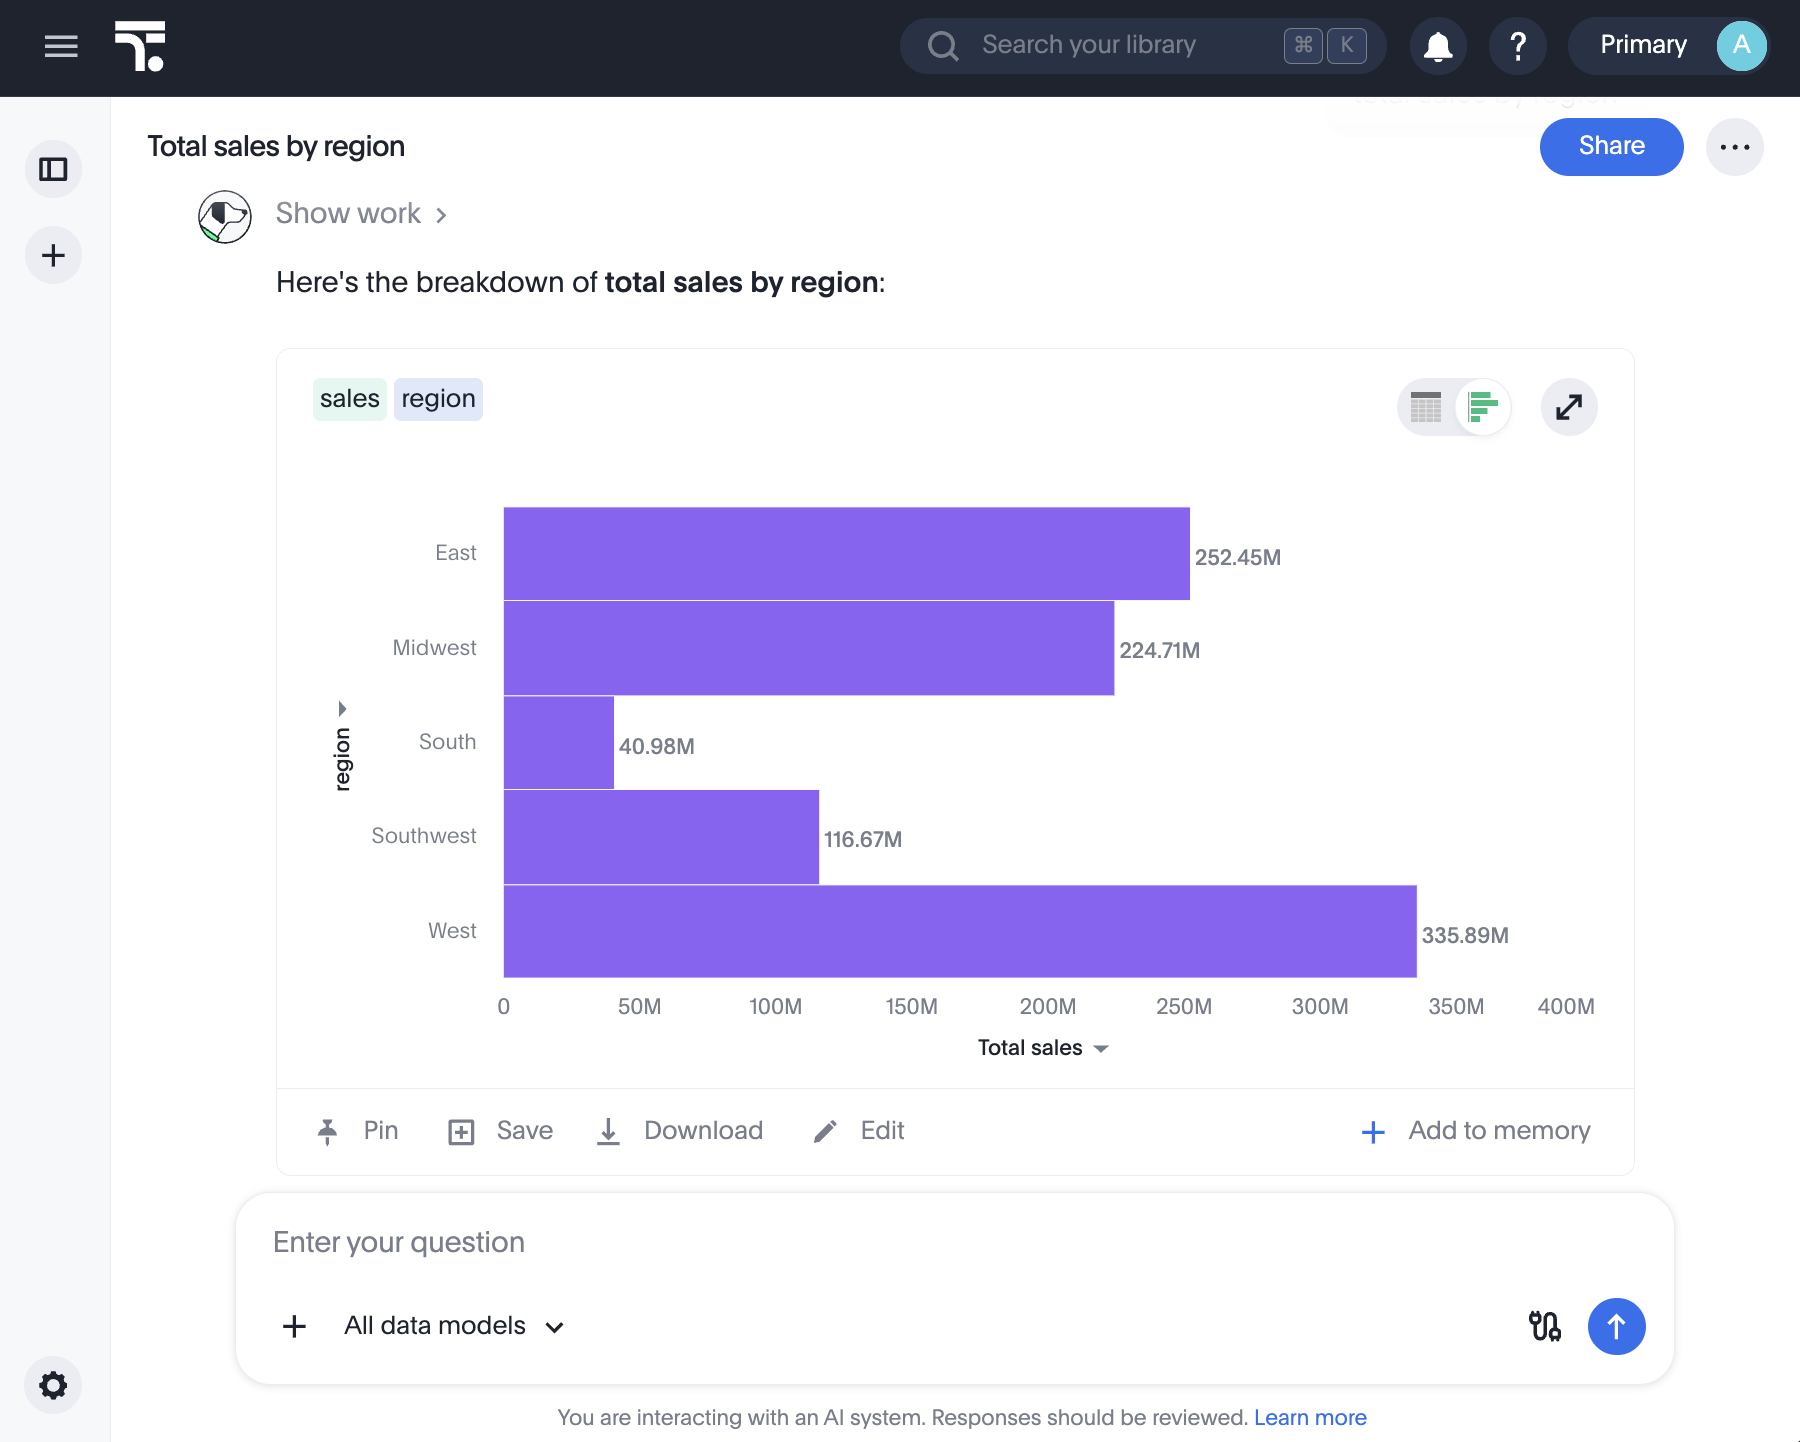
When Spotter answers your questions, it surfaces its response information in the form of the answer title and the search tokens used to construct the answer. When you ask a follow-up question, Spotter highlights the changes it made in search tokens to answer your question. You can also hover over formulas to see how they’re calculated, and edit them within Spotter.
To see a full-screen view of a visualization or table, click the expand arrows image in the top-right corner of the answer
Edit a Spotter answer
To edit a Spotter answer, click the Edit button above the Spotter question box. The Edit Answer window opens.
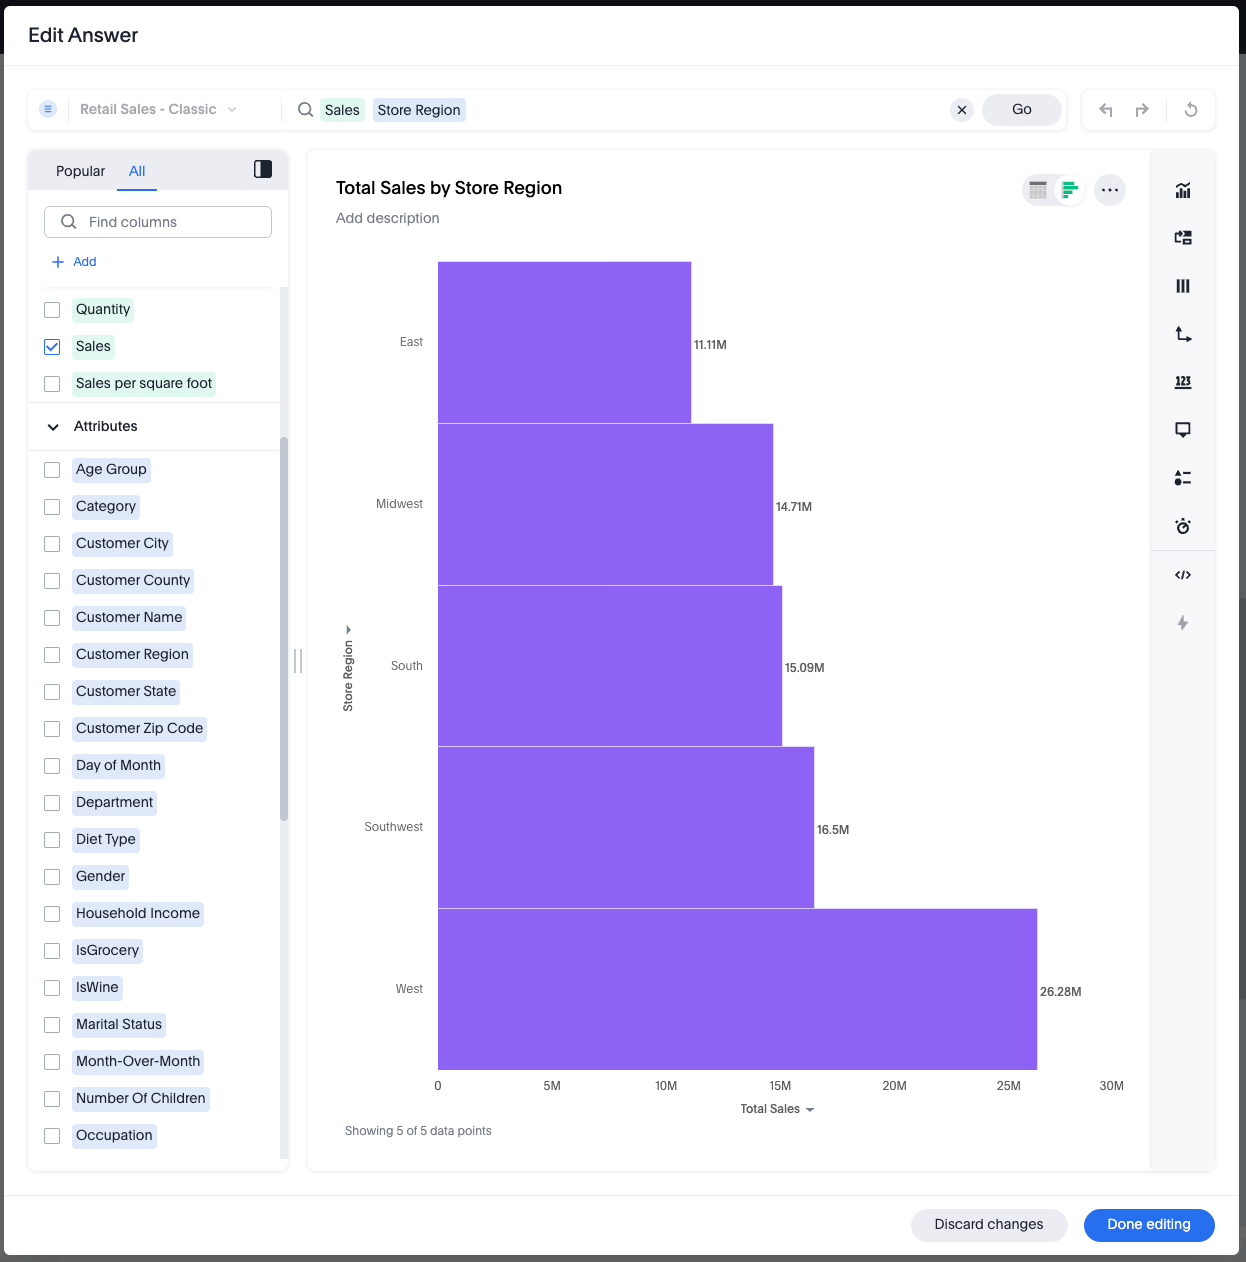
You can add or remove query tokens, change measures and attributes and even drill down by different attributes directly in the answer while in edit mode or even in the conversation itself.
To save your changes, click Done editing. Otherwise, click Discard changes.
If your ThoughtSpot administrator enables Add to coaching from chat, the check mark  and X
and X  are replaced by the + Add to Coaching and "Is this useful?" buttons. For more information, see Add to Coaching.
Spotter features
This section highlights features we’ve recently added that enhance and streamline the Spotter experience.
Spotter CSV upload
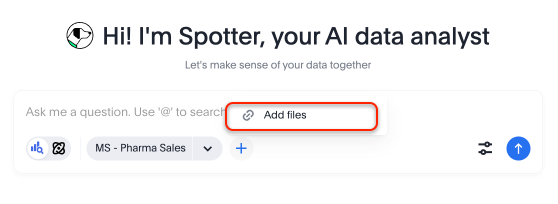
You can upload CSV files directly to Spotter, enabling ad-hoc data analysis without requiring a pre-built data model.
This feature makes it faster to explore and get insights from external data files directly in the Spotter interface.
Simply click the + icon next to the Model selection button in the search bar and select the file you plan to upload. Note that the files you upload remain only in your conversation, and are not stored in ThoughtSpot. The length of time your file persists depends on the Saved conversations setting; if saved conversations are disabled, the file persists for 6 hours. If saved conversations are enabled, the file persists as long as the conversation is saved (dependent the Chat history retention period setting in Admin settings > AI settings). The size limit is 5 mb per file, 10 files per message.
Spotter quick edits
You can click tokens in a Spotter answer to edit them for clarity, such as specifying whether a measure should be classified as count or unique count, or changing the column being used as an attribute.
To edit a Spotter answer’s tokens, follow these steps:
-
Click a Spotter token.
-
A review window pops up, showing options to clarify Spotter’s interpretation of your question. Measures allow you to change the aggregation type (for example, from
sumtoaverage) and column, while attributes let you change the column. You can change filters like dates fromrollingtofixedor change the date bucket (for example, from one year to one month). -
Click Apply. The answer updates to show the changes you made.
Give feedback on Spotter answers
You can give feedback on a Spotter answer without interrupting your conversation. This feedback is visible to your administrator in the Spotter Conversations Liveboard. This can be particularly helpful if you give feedback on incorrect answers, as this can highlight places where Spotter’s coaching can be better tailored to your business use cases.
If Spotter provides a correct answer, click the check mark at the bottom of the answer. If you see a thumbs up icon, you can review and save the underlying business terms and search query tokens so Spotter remembers your choices in the future for similar questions.
If Spotter provides an incorrect answer, click the X . If you are using Spotter Agent, you can give further details on what the answer got wrong. If you see a thumbs down icon, you can edit the underlying question, save, and then review the business terms and search query tokens of the answer.
To save a term, you must Approve or Reject it. After you approve or reject at least one business term, you can click Submit to save and share your feedback with Spotter.
Spotter shortcuts Early Access
Spotter shortcuts allow you to select from existing verified data constructs, like columns, filter values, and search data keywords, when you search. These shortcuts allow you to mix natural language and deterministic inputs when using Spotter. Spotter shortcuts allow you to create more precise questions by referencing actual column names and values from your Models. To enable Spotter shortcuts, contact ThoughtSpot Support.
| Values only appear if indexing is enabled. If indexing is not enabled, you see only column names and select ThoughtSpot keywords, weekdays, and system variables. |
To use Spotter shortcuts, do the following:
-
In the Spotter question box, type @ to enter lookup mode.
-
Select from the list of available columns, filter values, and search data keywords, then start your question.
Spotter agents
Spotter agents bring AI reasoning into processes that previously had to be done manually, like creating Models and Liveboards. To learn more about these features, see SpotterModel, SpotterViz and SpotterCode.
Every ThoughtSpot plan that includes Spotter will also include SpotterModel, SpotterViz, and SpotterCode at no additional charge, except that plans priced on a row-based or unlimited-consumption model will not include SpotterModel, SpotterViz, or Spotter Code unless separately purchased.
Limitations
To view Spotter’s limitations, see Spotter limitations.
Related information
Spotter, your AI Analyst course on

Additional Spotter getting started resource
We highly recommend that you register for the free Using Spotter the AI Analyst course in ThoughtSpot University that covers the information in this article, and watch the Using Spotter in Liveboards lesson.
See other training resources at ThoughtSpot University.

