Add a Google Cloud SQL for PostgreSQL connection
To connect to Google Cloud SQL for PostgreSQL, follow these steps:
-
Click the app switcher menu
 and then click Spotter.
 -
On the left side of the screen, select Manage data > Add data source.
-
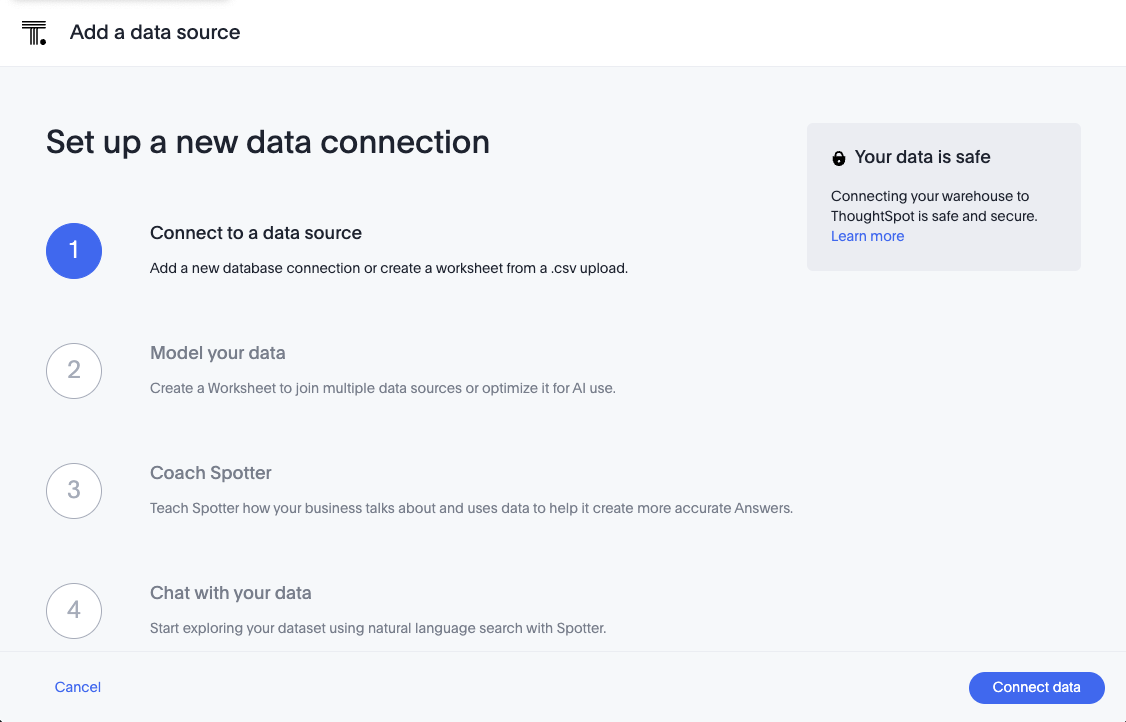
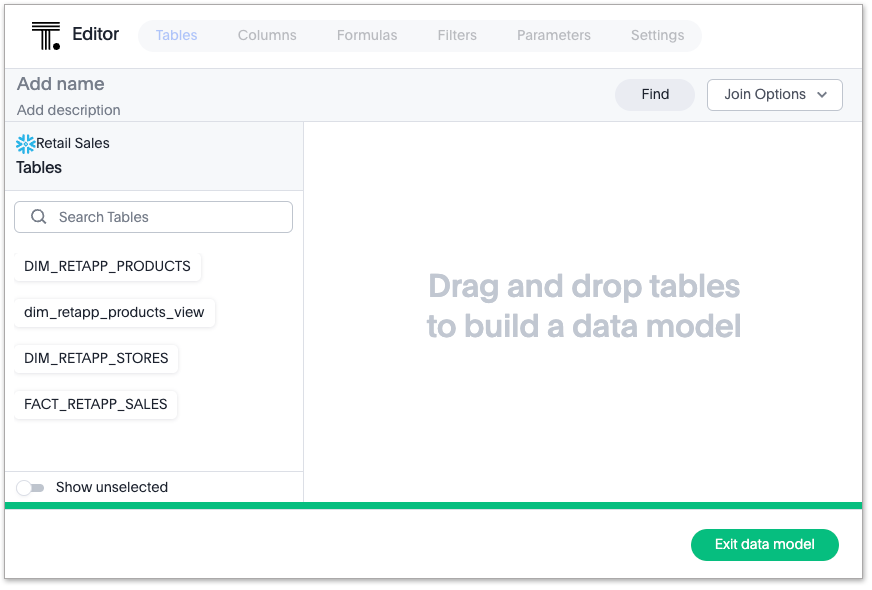
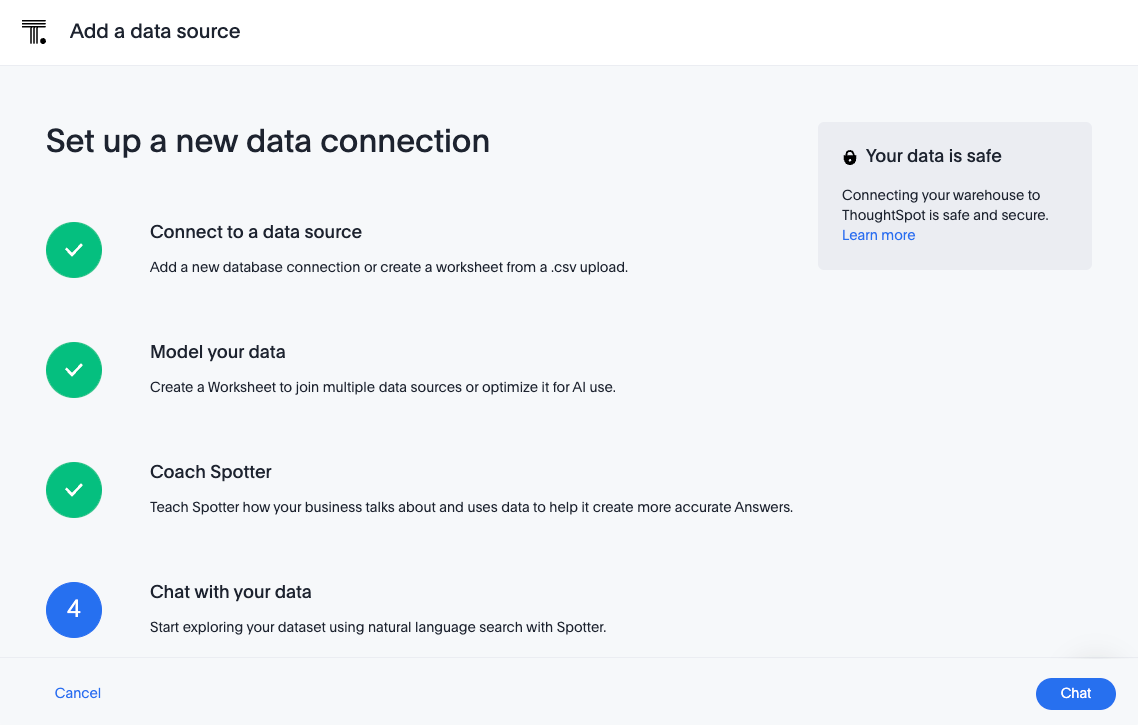
On the Add a data source page, click Connect data.
-
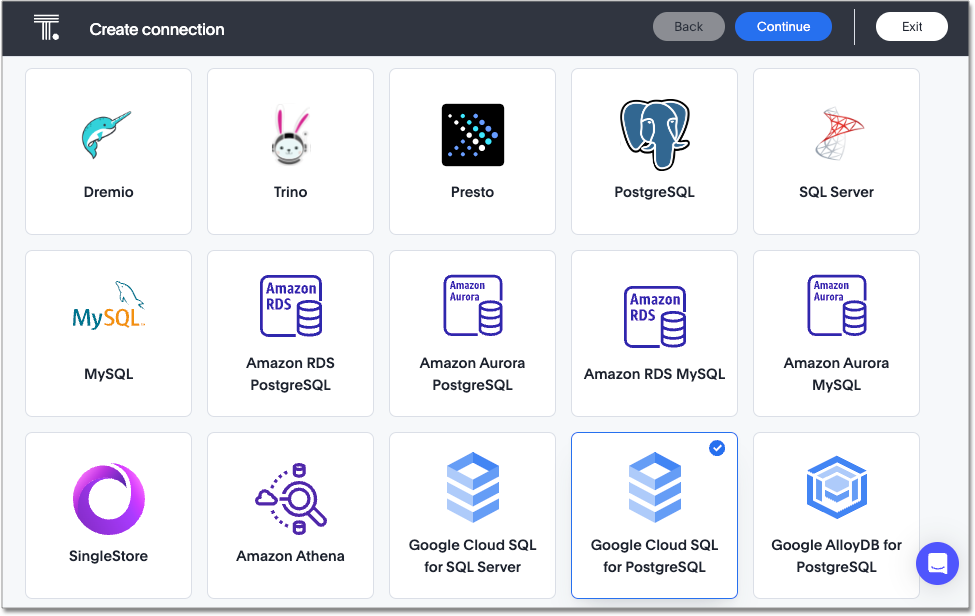
Create a name for your connection, a description (optional), then select the Google Cloud SQL for PostgreSQL connection type, and click Continue.
-
Enter the connection details for your Google Cloud SQL for PostgreSQL data source.
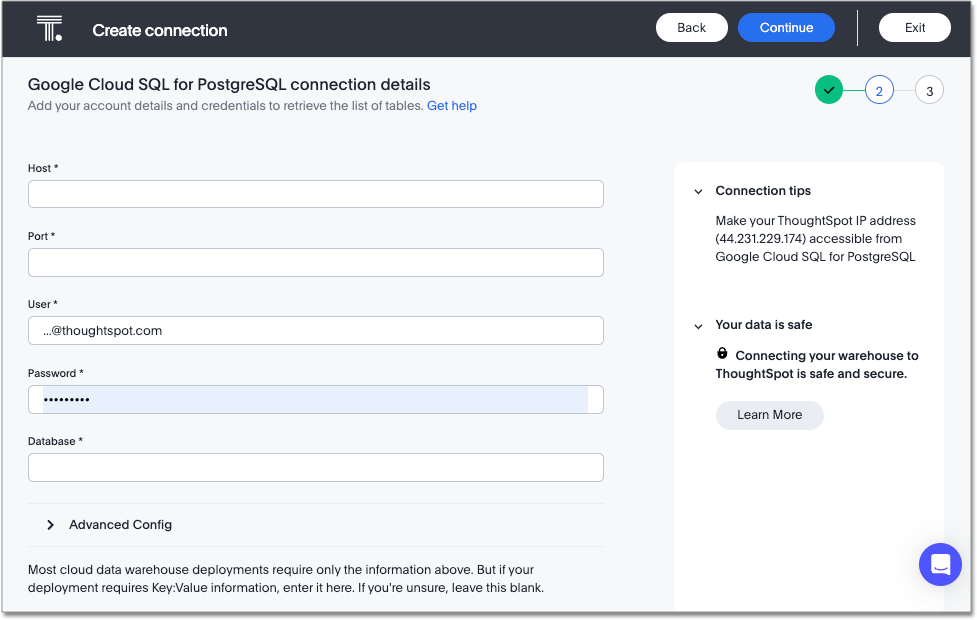
Refer to the Google Cloud SQL for PostgreSQL connection reference for more information on each of the specific attributes you must enter for your connection.
-
(Optional) Configure proxy for your Google Cloud SQL for PostgreSQL connection by doing the following:
-
Select the Advanced Config menu to reveal the Key and Value fields.
-
For Key, enter httpProxy, and for Value, enter <proxyHost>:<proxyPort>.
Example: 40.142.32.22:5050
-
-
(Optional) Provide additional key-value pairs that you need to set up your connection to Google Cloud SQL for PostgreSQL or customize additional JDBC parameters supported by Google Cloud SQL for PostgreSQL, by doing the following:
-
Select the Advanced Config menu to reveal the Key and Value fields.
-
Enter your key and value information.
-
To add more keys and values, select the plus sign (+), and enter them.
Any key-value pairs that you enter must be defined in your Google Cloud SQL for PostgreSQL data source. Key-value pairs are case-sensitive. -
-
Select Continue.
-
Select tables (on the left) and the columns from each table (on the right), and then select Create connection.

A message appears indicating the number of tables and columns that will be added to your connection.
-
Select Create.
-
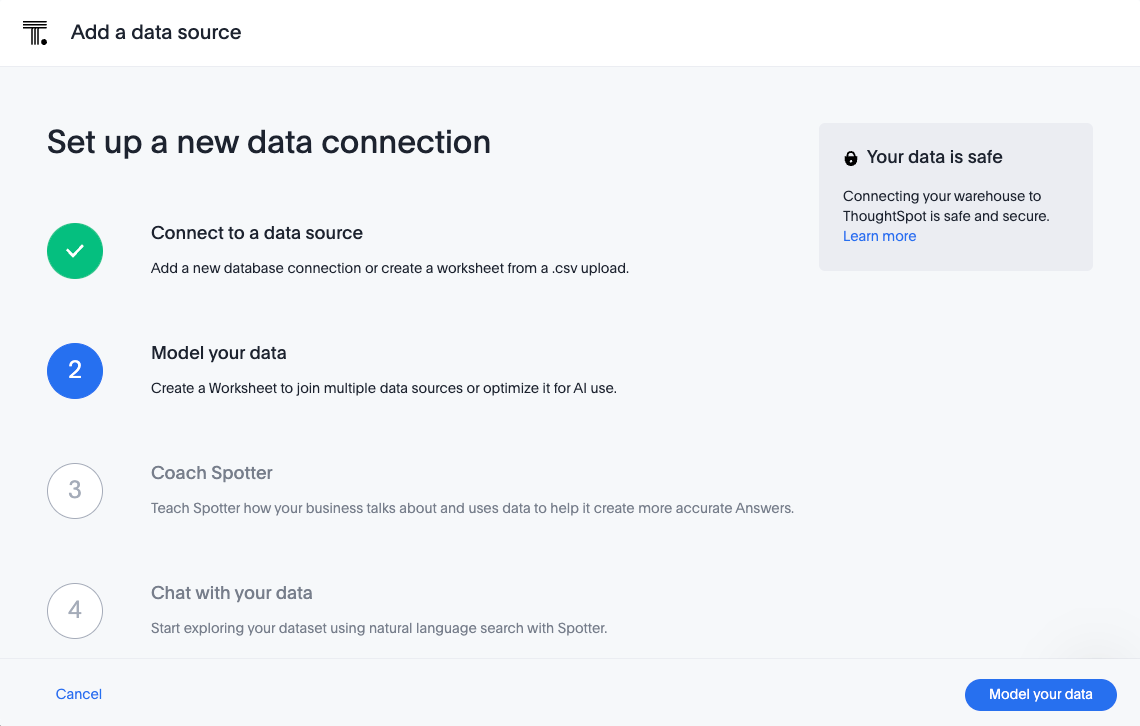
On the Add a data source page, click Model your data.
Model your data
After creating your Model, you need to add the sources that contain the data. A source is another name for a table. You do that using the Model editor. If you chose an existing model, you can make changes to your model.
The sources you choose are typically related to one another by foreign keys.
The first step to building your Model, is to add tables.
Adding tables
To add tables to your Model, do the following:
-
Drag tables from the list on the left, and drop them into the right pane.

Suggested joins
If the tables you added to your Model were joined previously, a join suggestion appears.
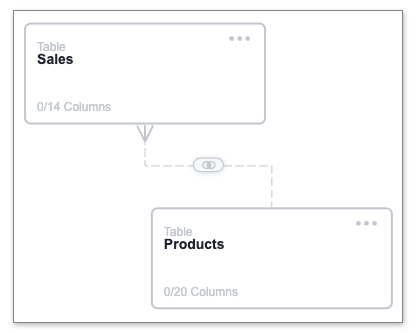
You can choose whether to keep, modify or remove the suggested join.
-
Click the join icon
 , then select one of the following options:
-
To keep the join, click Accept Join.
-
To modify the join, click Edit Join.
-
Make your changes and click Save. For more information, see step 2 of Adding joins.
-
-
To remove the join, click Clear Join.
-
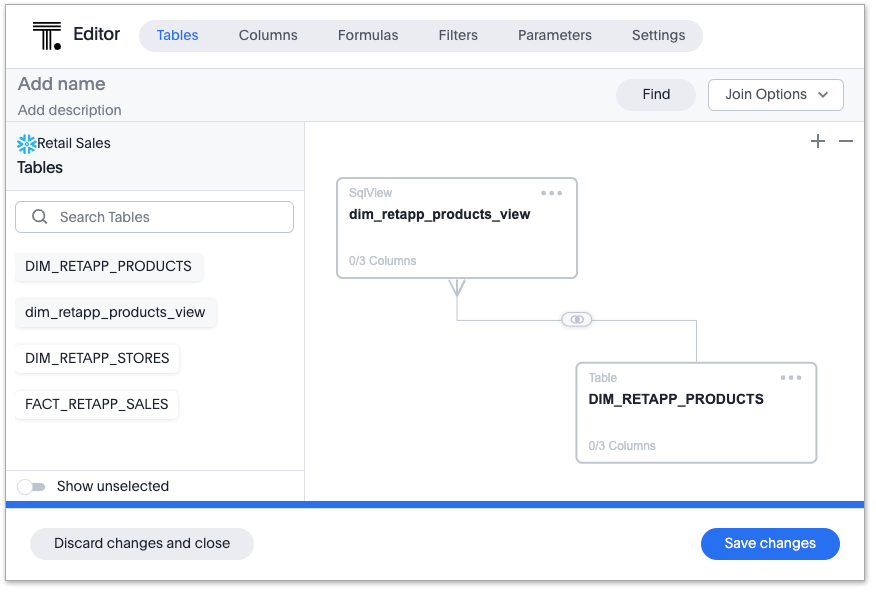
Adding joins
-
To add a new join between tables, do one of the following:
-
Select the More menu
 in the upper right of a table, and select Add Join.
 -
Hover over the table until you see a + appear on the edge of the table, then click the + and drag to the table you want to join.
-
-
In the Create Join window for Table 2, select the table you want to join to the first table (Table 1).
-
For Column from Table 1, select the column you want to join to another column in Table 2.
-
For Column from Table 2, select the column in Table 2 which you want to join to the selected column in Table 1.
-
For Join Type, select a join type. Options include:
-
INNER
-
FULL OUTER

-
LEFT OUTER

-
RIGHT OUTER

-
-
For Cardinality, select the cardinality. Options include:
-
Many:1
-
1:Many
-
1:1
-
-
Click Save.
The join is created.
-
Add additional tables and joins, as needed.
-
(Recommended) Name your Model by clicking Add name and entering a name.
-
(Optional) Add a description of your Model by clicking Add description and entering a description.
-
When you are finished adding tables and joins to your Model, the next step is to add columns.
Global and local joins
Models support both global and local joins. It’s helpful to understand the difference.
-
Global joins are created between two tables in a connection and they are available to any Model created in that connection. If you see a join suggestion when you create a model, it means that join is a global join.
-
Local joins are created in a specific Model and they are only available in that Model.
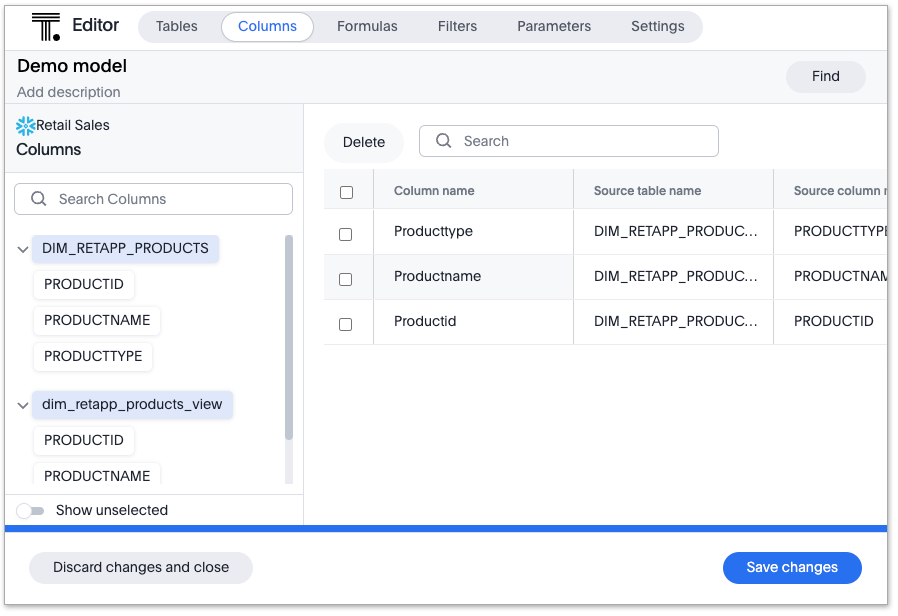
Adding columns
To add columns to your Model, do the following:
-
Click the Columns tab.
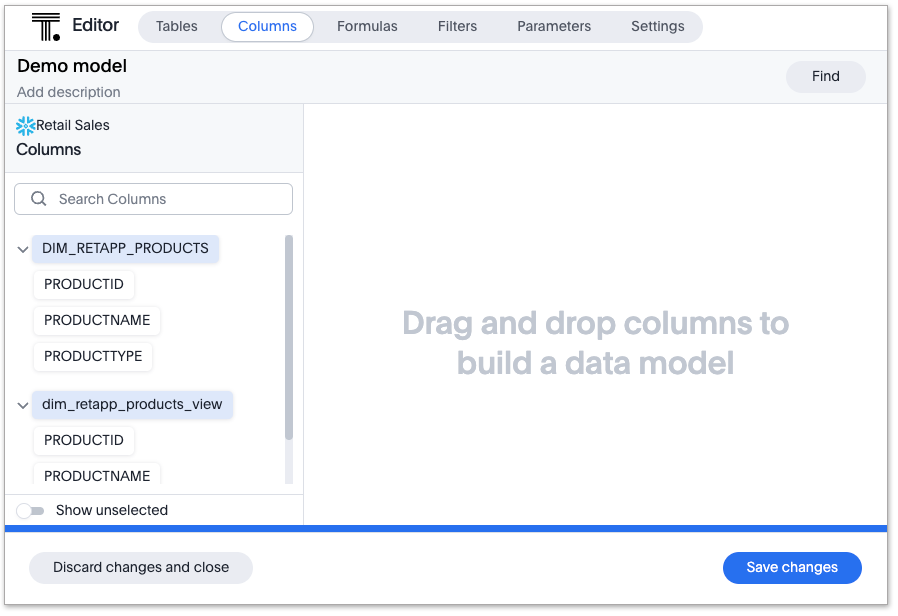
Table names are highlighted in blue, and their associated columns appear underneath them.
-
Add columns by doing either of the following:
-
To add all the columns from a table, drag the table name from the list on the left and drop it into the right pane.
-
To add an individual column from a table, drag the column name from the list on the left and drop it into the right pane.
-
-
(Optional) Edit column properties, using either of the following methods:
-
For an individual column:
-
Click the column property you want to edit, and make your changes.
-
-
For multiple columns:
-
Click the checkbox next to the columns you want to edit.
-
Click the Edit menu, and select the property you want to edit.
-
In the window that opens, select the option you want and click Update.
-
-
-
To save the columns in your Model, select Save changes.
You are prompted to edit the title and description of your Model.
-
Edit the title and description if needed.
-
Click Save.
Your model is saved, and you have the option to add formulas, filters, parameters, and adjust settings.
-
If you don’t want to add those now, select Exit data model.
Sorting and filtering columns
You have the option to sort any column in ascending or descending order, as well as apply a filter to a column by selecting possible values of the column.

To sort a column, do the following:
-
Click a column heading
-
From the pop-up menu, select either Sort ascending or Sort descending.
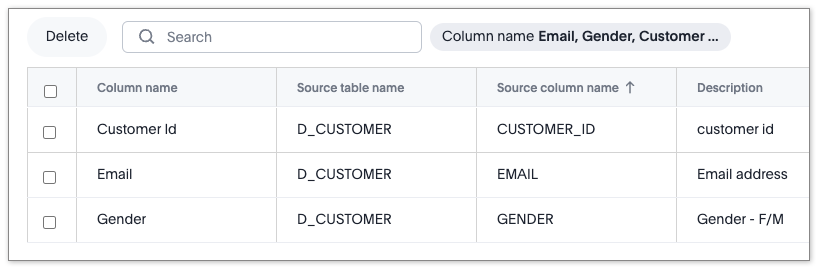
To filter a column, do the following:
-
Click a column heading
-
From the pop-up menu, select Filter.
-
In the Edit filter window, select the values you want to filter by and click Apply.
A label appears above the table indicating the values used to filter the column.
You can delete the filter by hovering over the label and clicking the (X).
In the Edit filter window, you also have the following options to use when editing or adding a filter:
-
Select all
-
Clear
-
Search
-
Show selected
Sort and filter states are not saved when you save your Model, however they do persist when you switch between tabs of the Model editor. -
Adding formulas
To add formulas to your Model, do the following:
-
Click the Formulas tab.
-
Click Add Formula.
-
Create a name for your formula.
-
Enter a formula, using the formula assistant (at right) if needed.
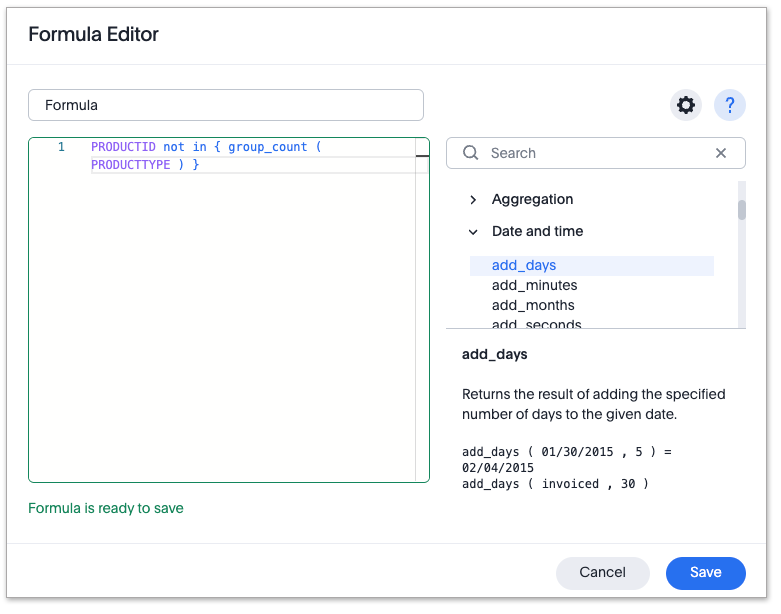
With the formula assistant, you can see a list of formula operators with examples.
If you want to change what your formula returns, select the Advanced settings button
 .
.Depending on your formula, you may be able to change:
-
Data type: Determines the type of data that the formula generates. For example, use date for an add_days formula.
-
Measure or attribute: Determines if the output of the formula is a measure or an attribute. For example, choose attribute for a formula that generates age groups, and choose measure for a formula that generates profit.
-
Aggregation: Determines the default aggregation of the formula output. For example, choose min to see minimum profit.
-
-
Click Save.
-
Click Save changes.
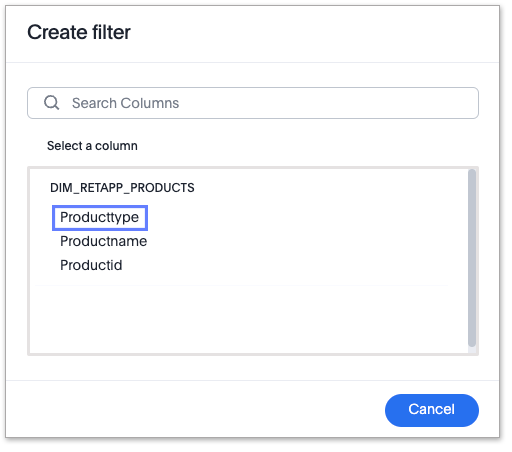
Adding filters
To add filters to your Model, do the following:
-
Click the Filters tab.
-
Click Add filter.
-
Choose the column you want to filter on.
-
Select the values to include in your Answer.
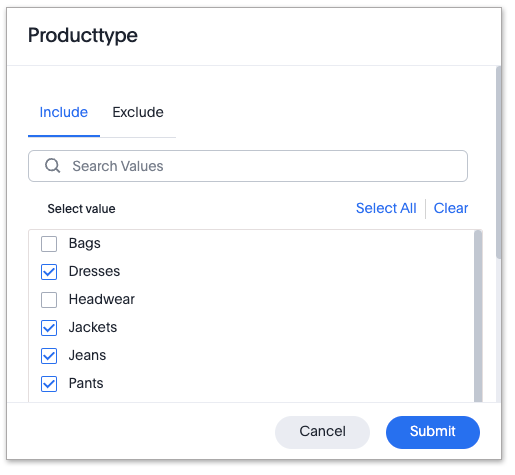
-
If you want to exclude values, select Exclude and choose values to exclude.
You can also include values in bulk, by clicking + Add values in bulk, and adding values separated by a comma (,) or a semicolon (;) or by putting them on separate lines.
-
Click Submit.
-
Click Save changes.
| ThoughtSpot recommends to not use more than 1,000 filter values in a Model. |
Adding parameters
To add parameters to your Model, do the following:
-
Click the Parameters tab.
-
Click Add Parameter.
-
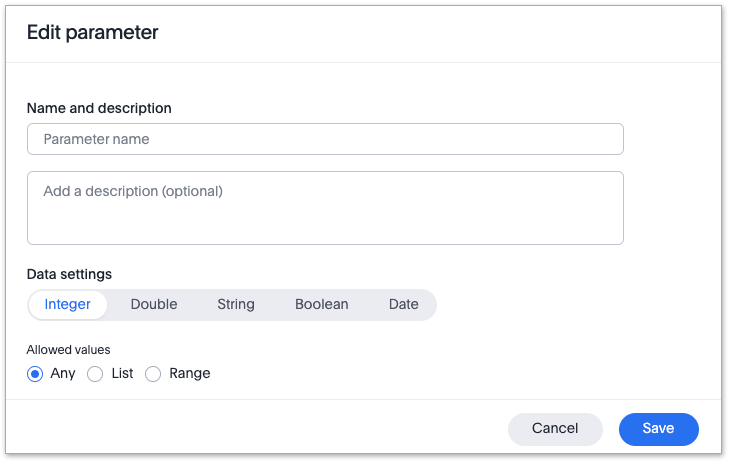
In the Parameter name text box, enter a name for your Parameter. This name should be unique for the object, and easy for users to understand.
-
Optionally, enter a description for the Parameter in the Add a description text box. Use this field to add additional information users might need before using this Parameter in their analysis. It is a best practice to use this field to specify the formulas this Parameter is used in, in addition to any other information you add.
-
Under Data settings, specify the data type the Parameter must be: Integer, Double, String, Boolean, or Date.
-
For integer, double, or date data types, specify the allowed values: Any, List, or Range. For the string data type, specify either Any or List.
Any Allows any value within the data type’s constraints.
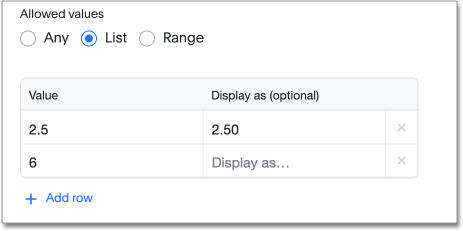
List Allows values only in the list you create. Enter a value in the Enter value… text box, and optionally enter what the value should display as in the Display as… text box. To add more values, select + Add row. To delete values, select the x to the right of the row the value is in.
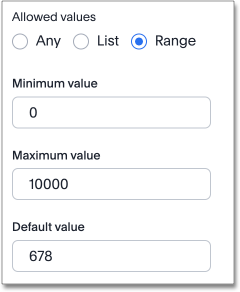
Range Allows values only within the range you specify. In the Minimum value and Maximum value text boxes, specify the values the range begins and ends with.
-
For the boolean data type, optionally set custom names for
trueandfalse; for example,0and1. -
Set the default value for your Parameter. In the default value text box, enter the value this Parameter should default to. For the boolean data type, the Default value option is a dropdown.
trueandfalseare the only options. -
Select Save.
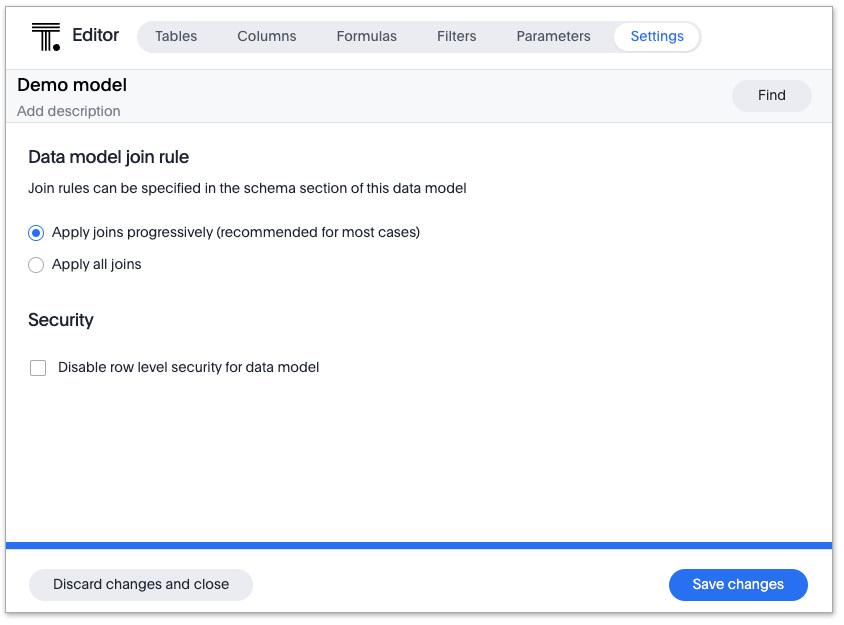
Settings
You can set properties for your model, including join rules and security.
To set properties for your Model, do the following:
-
Click the Settings tab.
-
For Data model join rule choose one of the following:
-
Apply joins progressively (recommended for most cases)
-
Apply all joins
-
-
For Security you have the option to disable row level security for your data model.
Often, a Model includes several dimension tables and a fact table. With progressive joins, if your search only includes terms from the fact table, you can see all of the rows that satisfy your search. But as you add terms from dimension tables, the total number of rows shown may be reduced, as the joins to each dimension table are applied. It works like this:
-
If you choose Apply joins progressively (recommended for most cases), joins are only applied for tables whose columns are included in the search.
-
If you choose Apply all joins, all possible joins are applied, regardless of which tables are included in the search.
When using Apply joins progressively, the number of rows in a search using the Model depends on which tables are part of the search. The Model contains the results of a defined query in the form of a table. So if a particular dimension table is left out of the search, its joins are not applied.
-
-
Click Save changes.
-
In the Describe your model window, name and describe your model (if you haven’t already), and click Save.
-
Click Exit data model.
Coach Spotter
You can teach Spotter how your organization uses your data by asking some questions, viewing the answers and refining them through your feedback. This helps Spotter to provide the kinds of answers you are looking for based on how you ask your questions.
To coach Spotter, do the following:
-
Select your dataset, if it is not already selected.
-
In the field to the right of the dataset name, enter a business question and click Next.
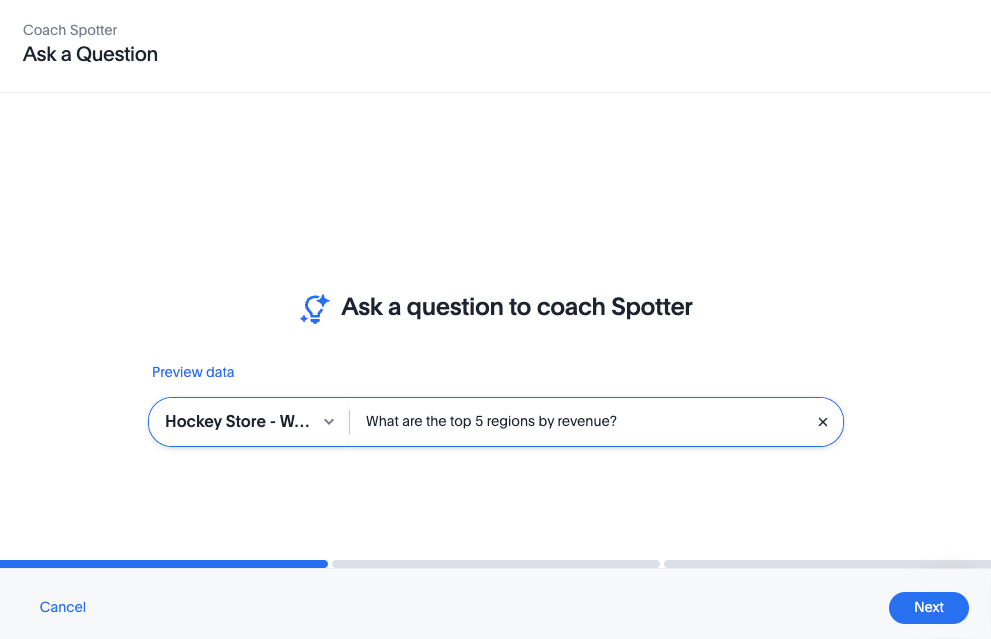
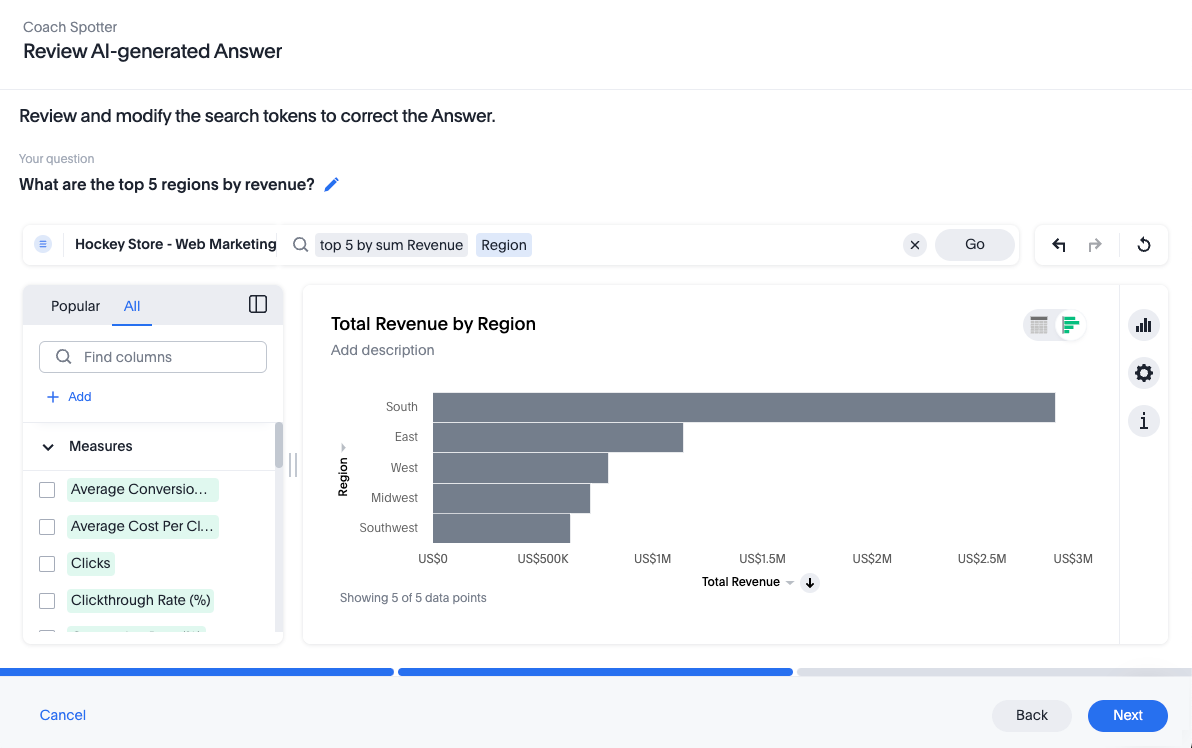
The AI-generated Answer appears.
-
Modify the answer, as needed, by adding columns using the list on the left, or by entering the column name next to the existing search tokens in the search field next to the name of the dataset.
-
When you are satisfied with the answer, click Next.
-
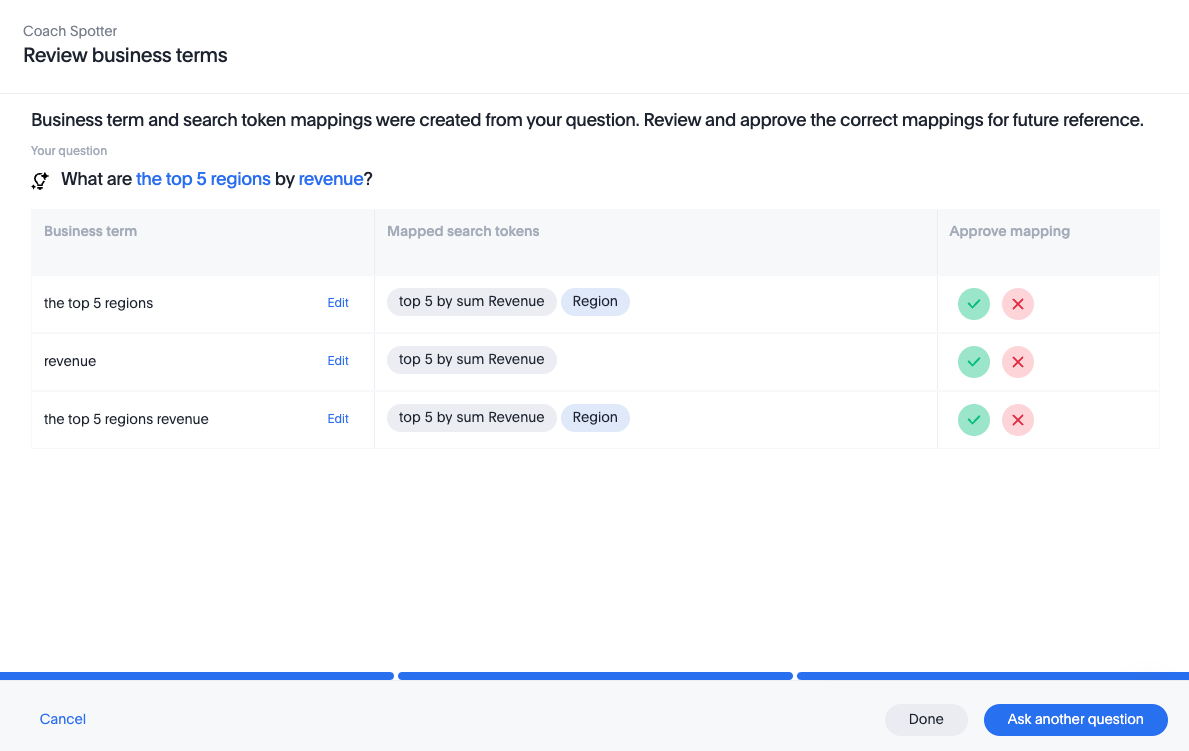
Review the business terms generated from the search phrase you entered and their mapped search tokens.
-
Approve or reject mapped search tokens by doing the following:
-
To approve, click the green check mark
 .
. -
To reject, click the red X
 .
.
-
-
To ask another question, click Ask another question.
-
When you are finished, click Done.
-
On the Add a data source page, click Chat.
Chat with your data
Now you are ready to use Spotter with your dataset.
-
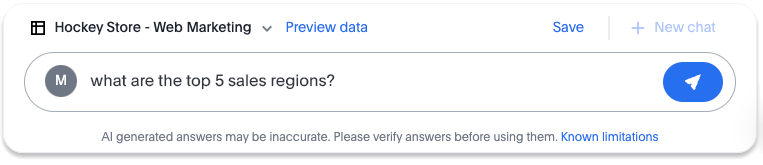
On the Spotter page, enter a question in the Ask a question field, and click the submit button
 .
.
-
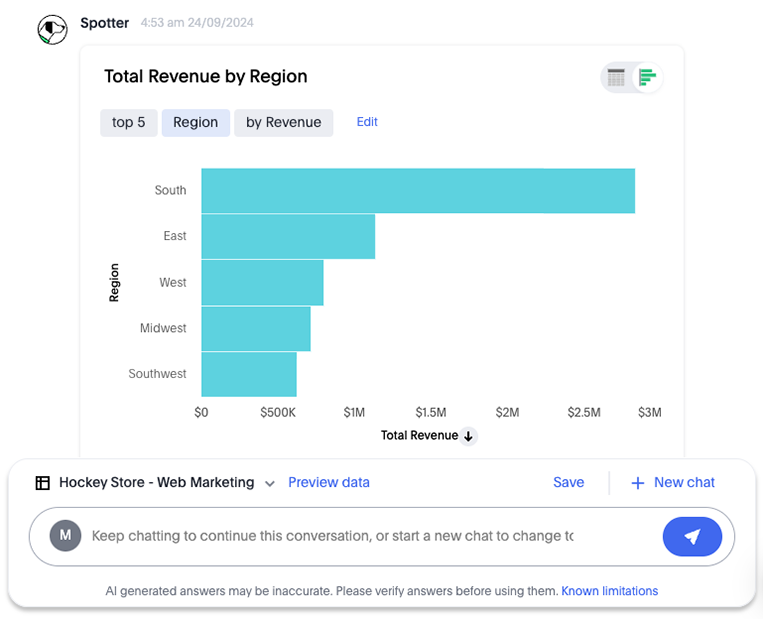
Edit the answers, if needed, by clicking the Edit link next to the search tokens of the Spotter answer.
-
Continue using the chat field to ask questions of your data.
-
If you want to save your chat history, click Save above the search field. After you save your chat once, each additional question you ask, and the answer, are saved automatically.
You can view any of your saved chats and continue asking questions by going to the Saved insights list on the Spotter page, clicking the name of the dataset you chatted with, and then clicking the name of the saved insight.
Related information


