Enabling Spotter
To enable Spotter search and other AI features for users in your organization, you must first enable AI features from the Admin portal, add Spotter privileges to the specific users or groups, and enable Spotter on your desired Model(s).
Turn on AI features for your instance
To turn on AI features for your instance, follow these steps:
-
Navigate to the Admin tab. If you have multiple Orgs in your instance, select All Orgs.
-
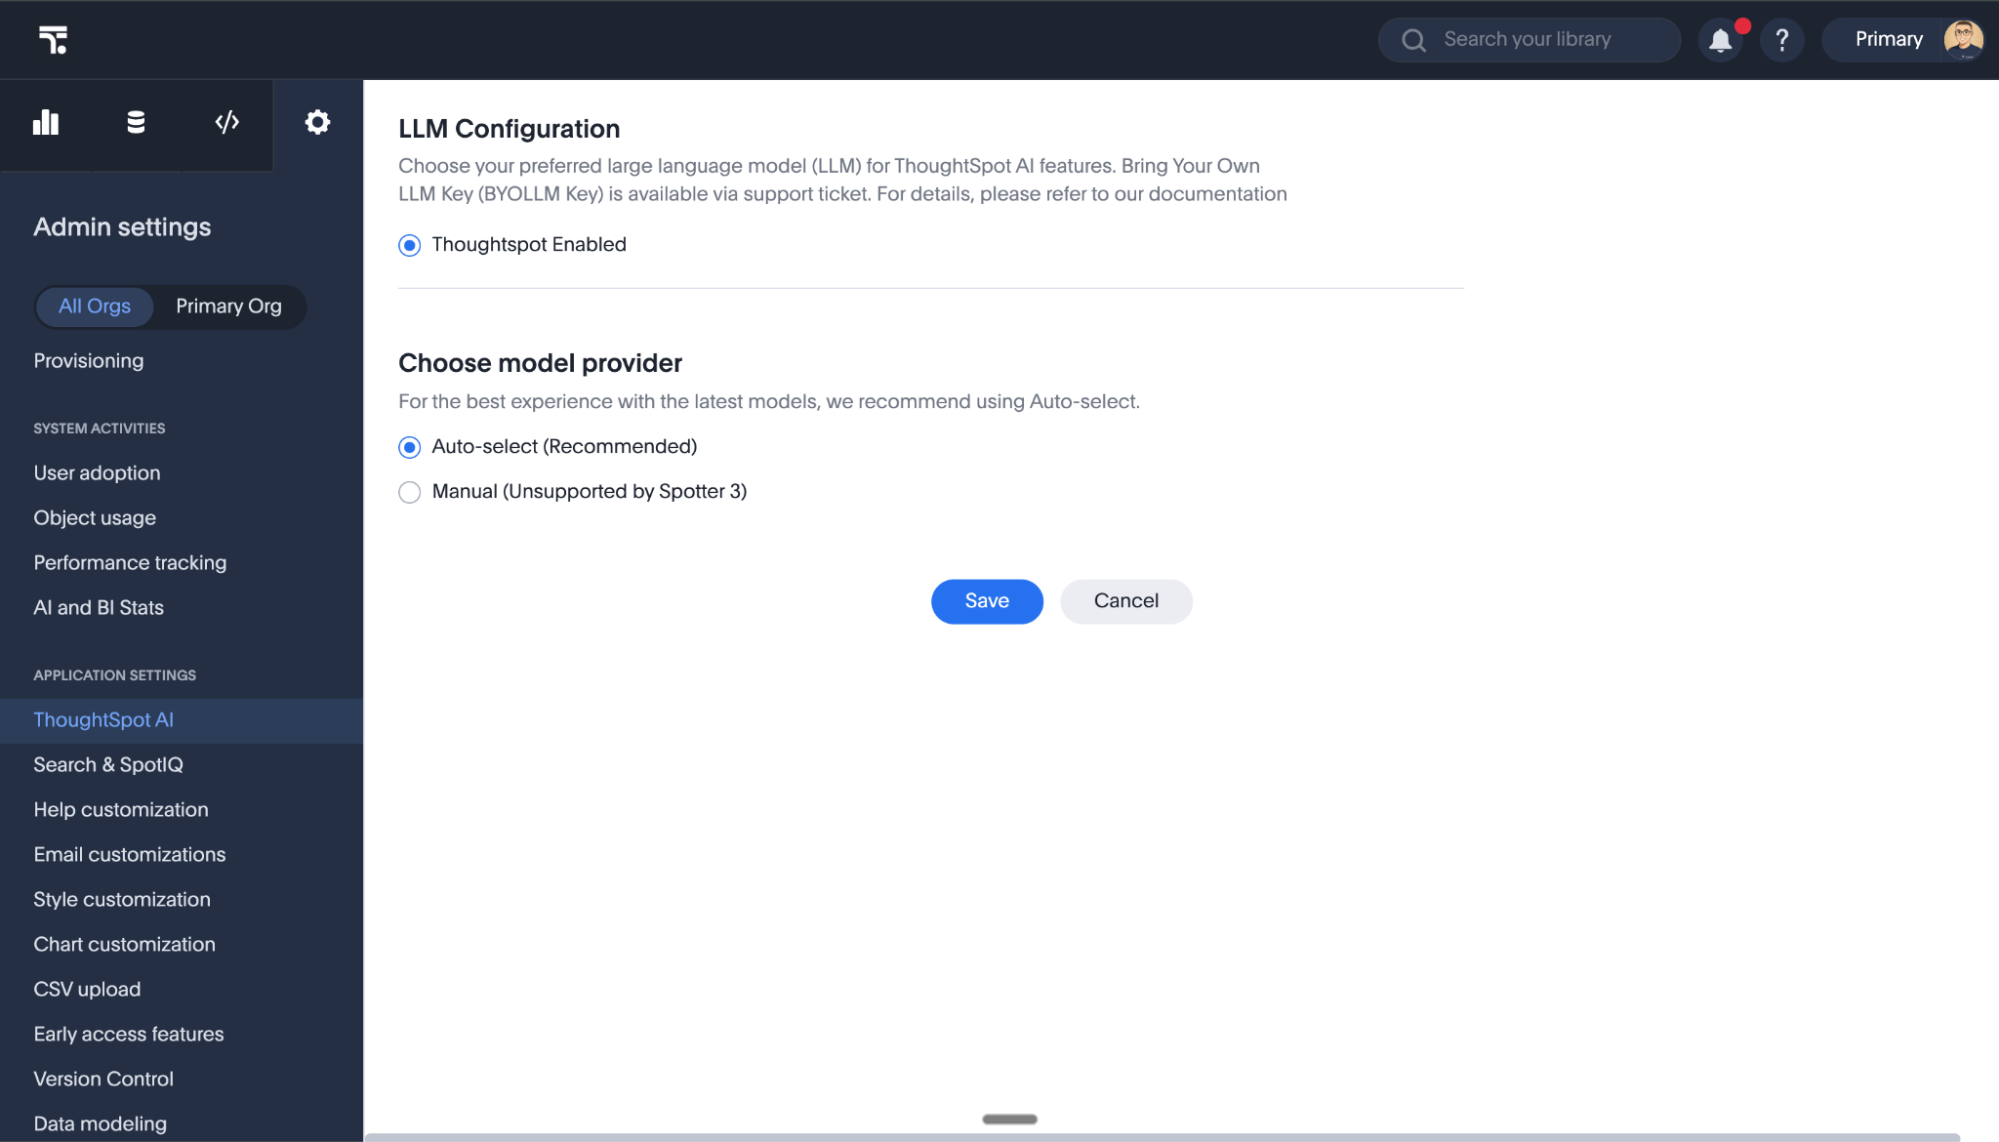
Select ThoughtSpot AI under the Application settings section in the left side menu.
-
From the Spotter version section, you can choose either Spotter 3, Spotter Agent (Spotter 2), Spotter Classic (Spotter 1) or Sage / Ask Sage (Deprecated).
-
From the Choose where your users can access Spotter section, you can enable Spotter on the home page and left navigation, and on Liveboards.
If you select Spotter under Choose Spotter experience, but do not enable Spotter on the home page or on Liveboards, users on your instance will not be able to access Spotter. -
From the Spotter 3 capabilities section, you can enable optional features included in this version.
Set Auto-mode to automatically select a data model to enabled to allow Spotter to select a data model to search based upon your questions.
Set Enable Connectors/MCP to enabled to allow Spotter to connect with external apps and draw data from them or push data to them from a conversation.
Set Enable chat history to enabled to let Spotter keep a record of each user’s chat history and allow users to revisit past interactions.
Set Chat history retention period to 6 hours, 30 days, 90 days, or 180 days to control how long content persists in your chat history.
Set Memory from Liveboards and conversations to enabled to allow Spotter to learn from your liveboards and conversations.
Set Personal memory (EA) to enabled to support Spotter’s capability to personalize conversational memory for each user.
-
From the Configure user experience section, you can control users’ ability to coach Spotter, and allow Spotter to suggest questions for analysis.
Enable add to coaching from conversation to allow users to coach business terms and reference questions without leaving Spotter.
Enable AI Sample Questions to allow Spotter to suggest questions based on the selected data model below the search bar in the home page.
-
From the SpotterViz section, enable SpotterViz to create Liveboards according to your prompts.
-
From the Other AI features section, you can enable features like AI narratives for SpotIQ, and AI highlights on Liveboards.
-
From the LLM Configuration section, you can choose which provider to use for ThoughtSpot’s AI features. We currently support ThoughtSpot Enabled (auto-select), Azure OpenAI, and Google Gemini (Early Access), and custom LLM gateways.
With Spotter 3 you have the following options:
-
Choose ThoughtSpot Enabled (ThoughtSpot Provided) and let ThoughtSpot provide the LLM.
-
Bring your own LLM key, which requires you to provide both Claude and GPT LLMs in your BYOLLM configuration. For details on BYOLLM with Spotter 3, see Connect to your Large Language Model (LLM).
To ensure ThoughtSpot consistently delivers the highest accuracy and lowest latency, we are shifting our focus away from static, pre-bundled manual configurations of Azure OpenAI and Gemini. It is difficult to provide a best-in-class AI experience when limited to a restricted set of LLMs
Moving ahead, we strongly recommend selecting ThoughtSpot-Enabled Auto Select to all ThoughtSpot administrators. This option allows ThoughtSpot to automatically leverage the best frontier models for specific features, including Spotter 3. As we continuously test and adopt new frontier models, our core commitments remain absolute: we guarantee zero data retention and no training on LLM data.
Impact on Existing Presets: Your current manual configurations will continue to operate for legacy features, but they will not receive further support for newer capabilities like Spotter 3. From 26.5.0.cl, these preset options will no longer be configurable in the Admin UI and will be handled by contacting ThoughtSpot Support.
Custom Requirements: For organizations with strict, non-negotiable compliance and governance requirements, connecting to your own private LLM endpoints (BYOLLM) remains fully supported. Please contact ThoughtSpot Support to configure a custom key.
-
-
From the Data Models section, you can disable AI search on all data models. To enable AI on a data model, you need to access the individual Model from the Data workspace and turn it on.
-
From the User privileges section, you can click to be directed to Users and Groups in order to assign privileges.
Note that users or groups must have Can use Spotter permissions to access Spotter.
-
To revert to the previous settings, click Reset configuration.
Enable Spotter for a user group
You can enable Spotter for a certain group, but each group member will use the version of Spotter selected by the admin under Spotter version. To give Spotter privileges to a certain user group, follow these steps:
-
Navigate to the Admin panel, either by clicking on the Admin button in the top menu or by selecting Admin from the app switcher icon.
-
If your instance has Orgs enabled, navigate to the Primary org tab in the left menu and select Groups under User management. Otherwise, select Groups under User management.
-
Select the name of the desired user group to open the Edit group pop-up.
-
Scroll to the Roles section and select the checkbox next to the can preview Spotter privilege. Click Review selection and Save.
Also, ensure the group has the Can download data privilege. Spotter 3 acts as an extension of the user and requires this privilege to analyze and retrieve data on their behalf.
If RBAC is enabled on your instance, the Spotter role may be titled can preview thoughtspot sage. We recommend creating a new role titled Can use Spotter, mapping it to the can use Spotter privilege under Application Control, and using this new role for granting access to Spotter AI capabilities. The can preview thoughtspot sage role will be removed in future releases.
|
Enable Spotter for a Liveboard
In order for users to access Spotter on a Liveboard visualization, the underlying data source must be enabled for Spotter. To enable a Model for Spotter, follow these steps:
-
Navigate to the Data workspace, either by selecting Data in the top menu bar or by selecting Data workspace from the app switcher icon.
-
Select the Model from the list in the Data workspace.
-
Click the More icon
 in the upper right corner and select Enable Spotter.
If Spotter is disabled on a certain Model, users will still see the Spotter icon on visualizations built on any dependent Liveboard. Clicking Spotter will result in an error message prompting users to ask an admin to turn on AI features for the data source. If none of the data models making up a Liveboard are enabled for Spotter, users will see the Answer Explorer option rather than the Spotter icon.
Security
Spotter respects all existing security measures, including row-level security and column-level security.
To access Spotter on a Model, three tiers of permissions are required. Spotter must be enabled for your instance, the Model must have Spotter enabled, and you must have Spotter user privileges. For Spotter 3, users must also have the Can download data privilege, as Spotter analyzes data on the user’s behalf.
Users without proper privileges see a pop-up message indicating "Spotter is not enabled for you."
Data shared with LLM
When using Spotter 3, data is shared with the LLM when you use the why questions feature, send a query to the cloud data warehouse, or use a Spotter connector.
Please ensure this complies with your organization’s policies. The data is not utilized for model training, and we maintain a zero-data retention policy with all our LLM providers.
For more information on how data is handled in Spotter 3, see Spotter 3 data handling.