Connect to Amazon Web Services in Analyst Studio
Overview
We have two ways of connecting to your RDS instance depending on your AWS settings. If your instance is publicly accessible, then Analyst Studio can connect directly to it. For databases that are not accessible, you can use the Bridge connector. We’ll start by determining if your database is accessible to us.
Accessibility
-
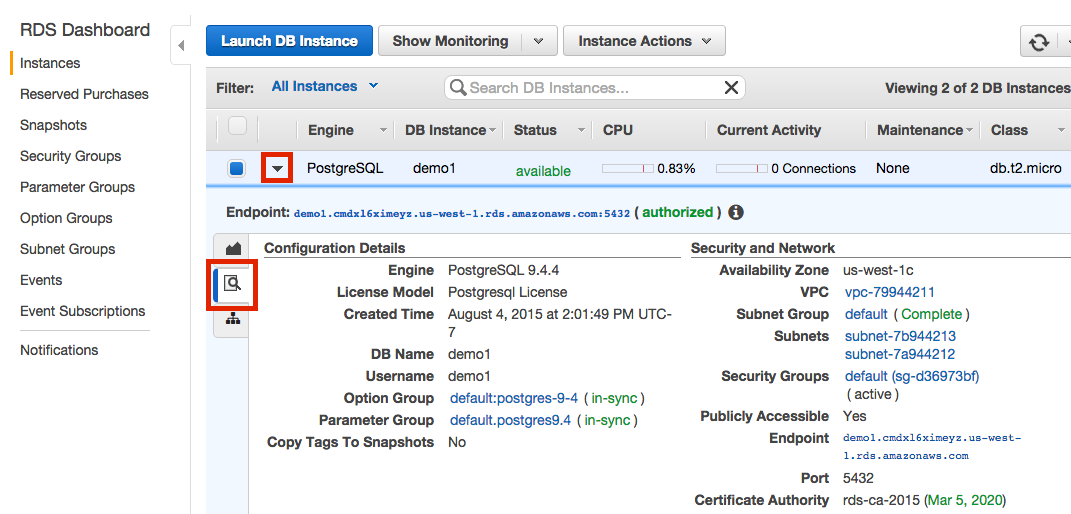
Navigate to your RDS Instance Console.
-
Click the arrow and then magnifying glass to view the details of the instance that you want to connect.
-
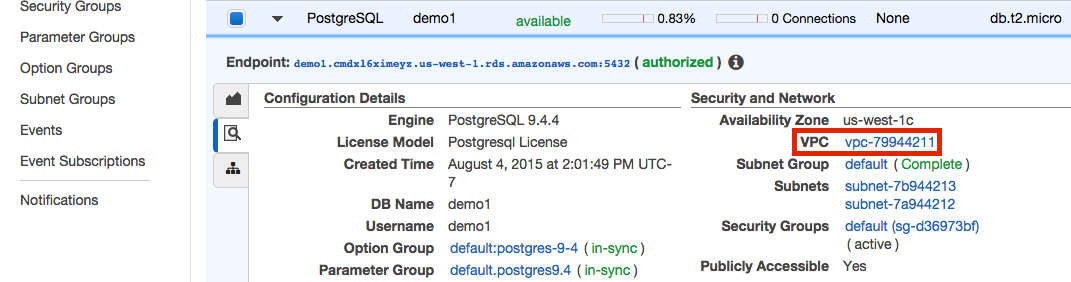
Look under Security and Network. Your instance is in a VPC if there’s an entry labeled VPC. It is typically found below Availability Zone and above Security Groups. If you don’t have an entry here, then your instance is not in a VPC, and you can jump to the Security Groups section below.
-
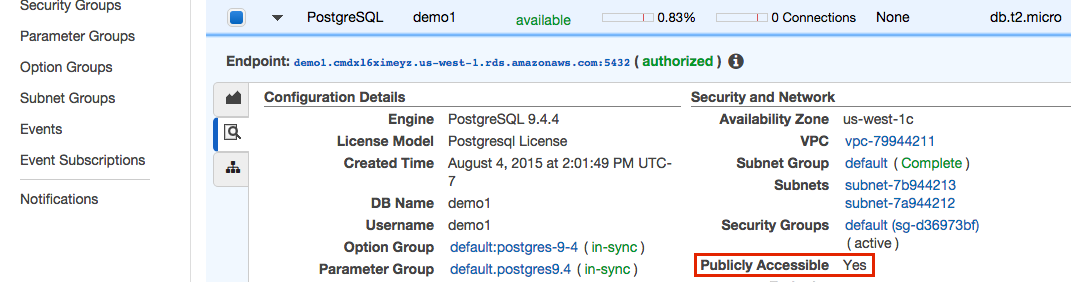
Instances in VPCs can be public or private. We can find out by looking under Security and Network again. This time for an entry labeled Publicly Accessible. If it is followed by a Yes, then you can jump to the Security Groups section below.
-
To connect to instances in a private VPC, you’ll need to install our Bridge connector.
Security groups
All connections from Analyst Studio will come from one of the eight IP addresses below. In most cases, you’ll need to add these addresses to your RDS instance’s Security Group. We’ve broken the steps down into two sections: VPC and No VPC. Security Groups in a VPC are managed the same between EC2 and RDS. RDS instances outside of a VPC have a different process.
-
54.68.30.98/32 -
54.68.45.3/32 -
34.209.23.118/32 -
54.188.241.100/32 -
52.43.195.103/32 -
3.224.146.111/32 -
54.221.238.89/32 -
52.20.173.236/32 -
18.219.18.49 -
3.20.219.67 -
3.130.46.196 -
18.190.82.112 -
18.219.27.193 -
18.224.75.176 -
3.143.83.15 -
3.22.39.190 -
52.15.221.243
VPC
-
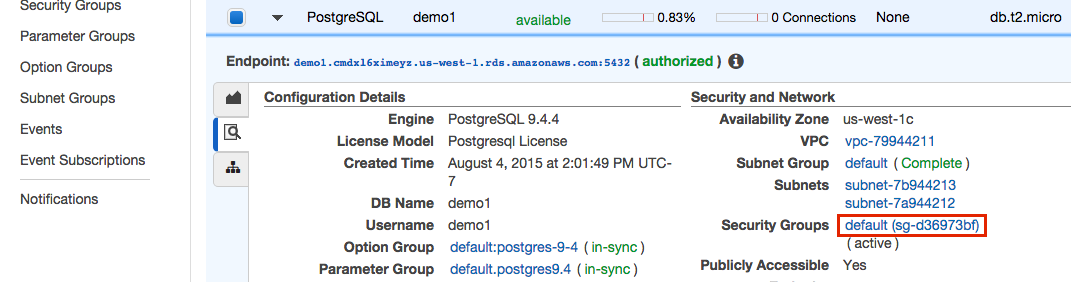
Under Security and Network, click the security group name.
-
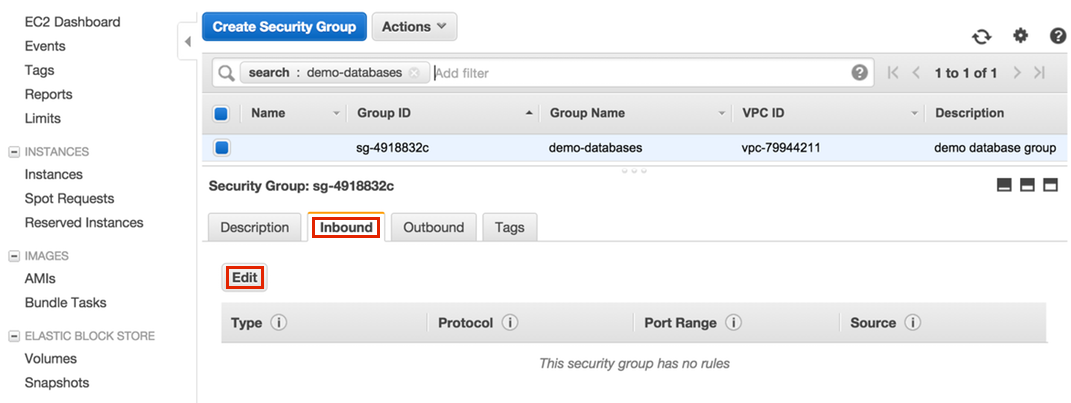
A new tab will be opened. Click on the Inbound tab and then Edit.
-
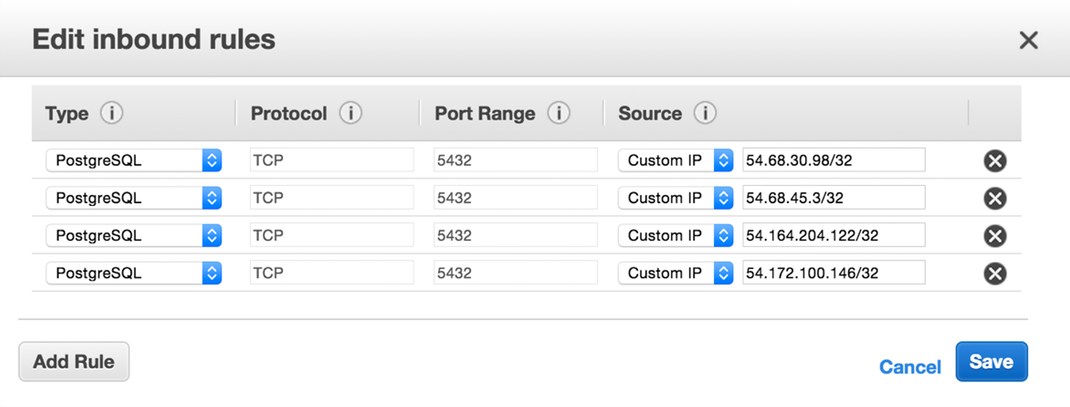
Find the RDS type that matches your instance (for example, PostgreSQL), enter each of our addresses, and then click Save.
No VPC
-
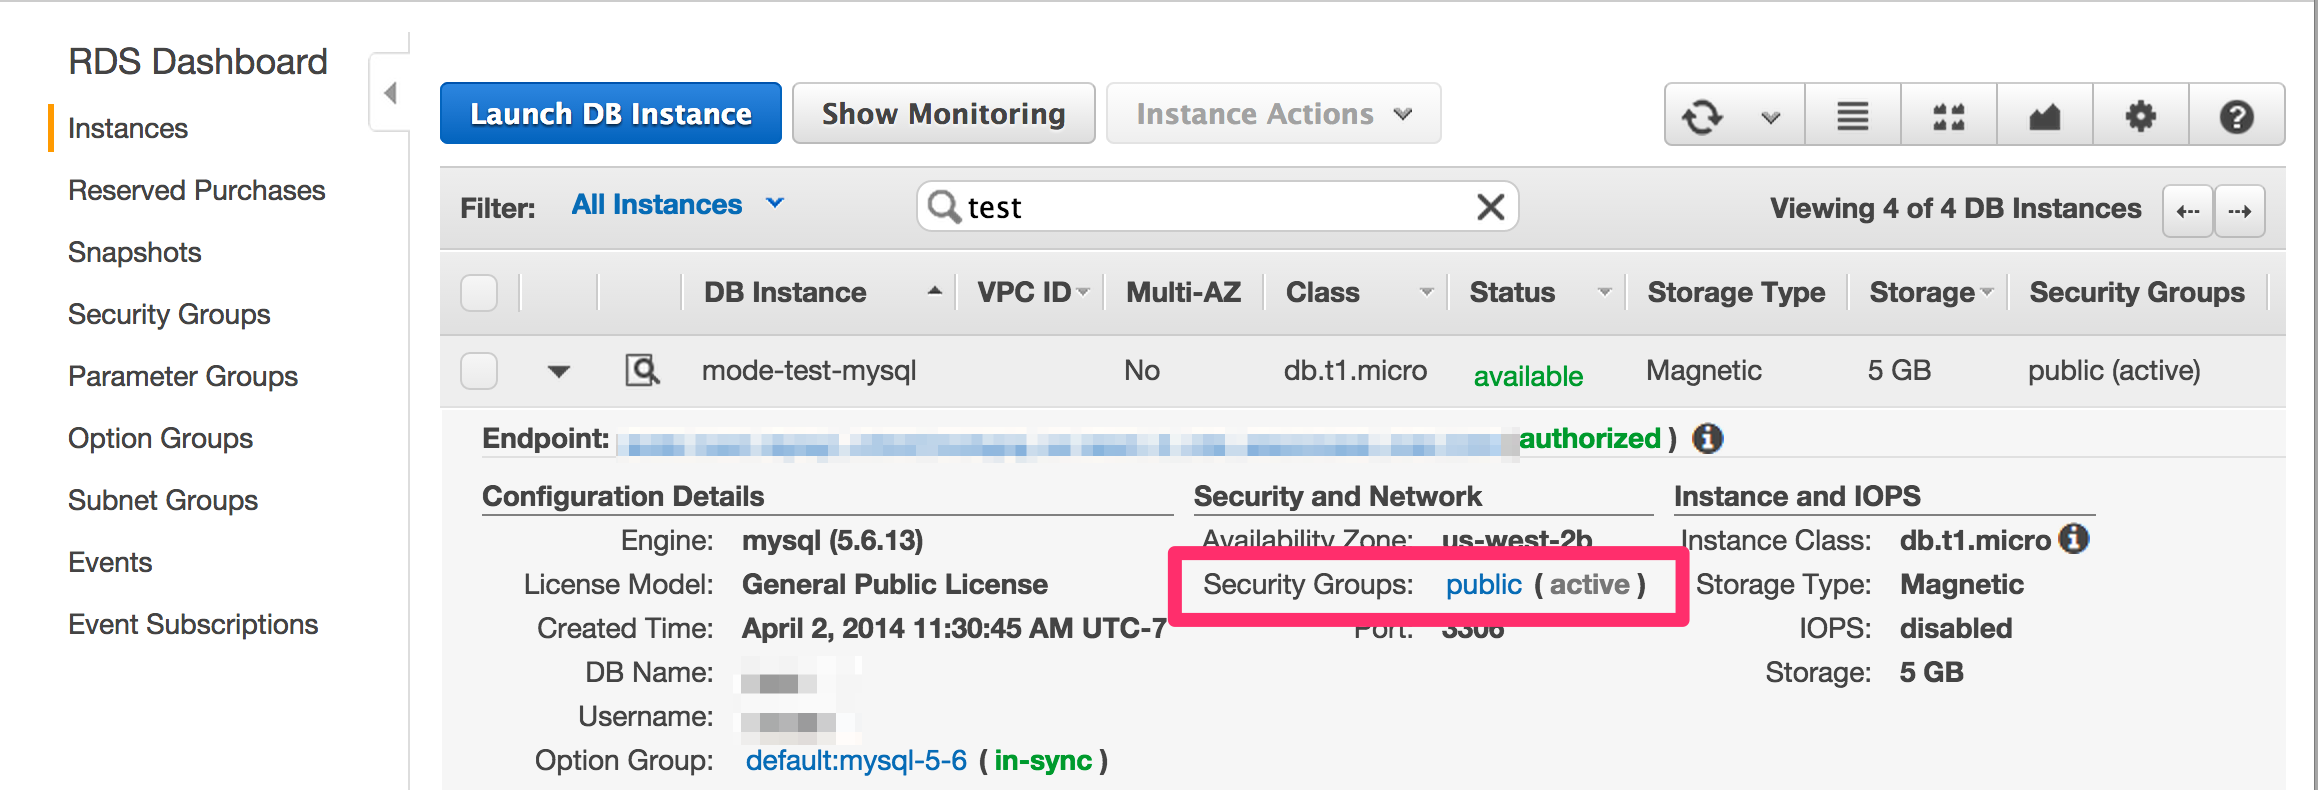
Under Security and Network, click the security group to which that database belongs.
-
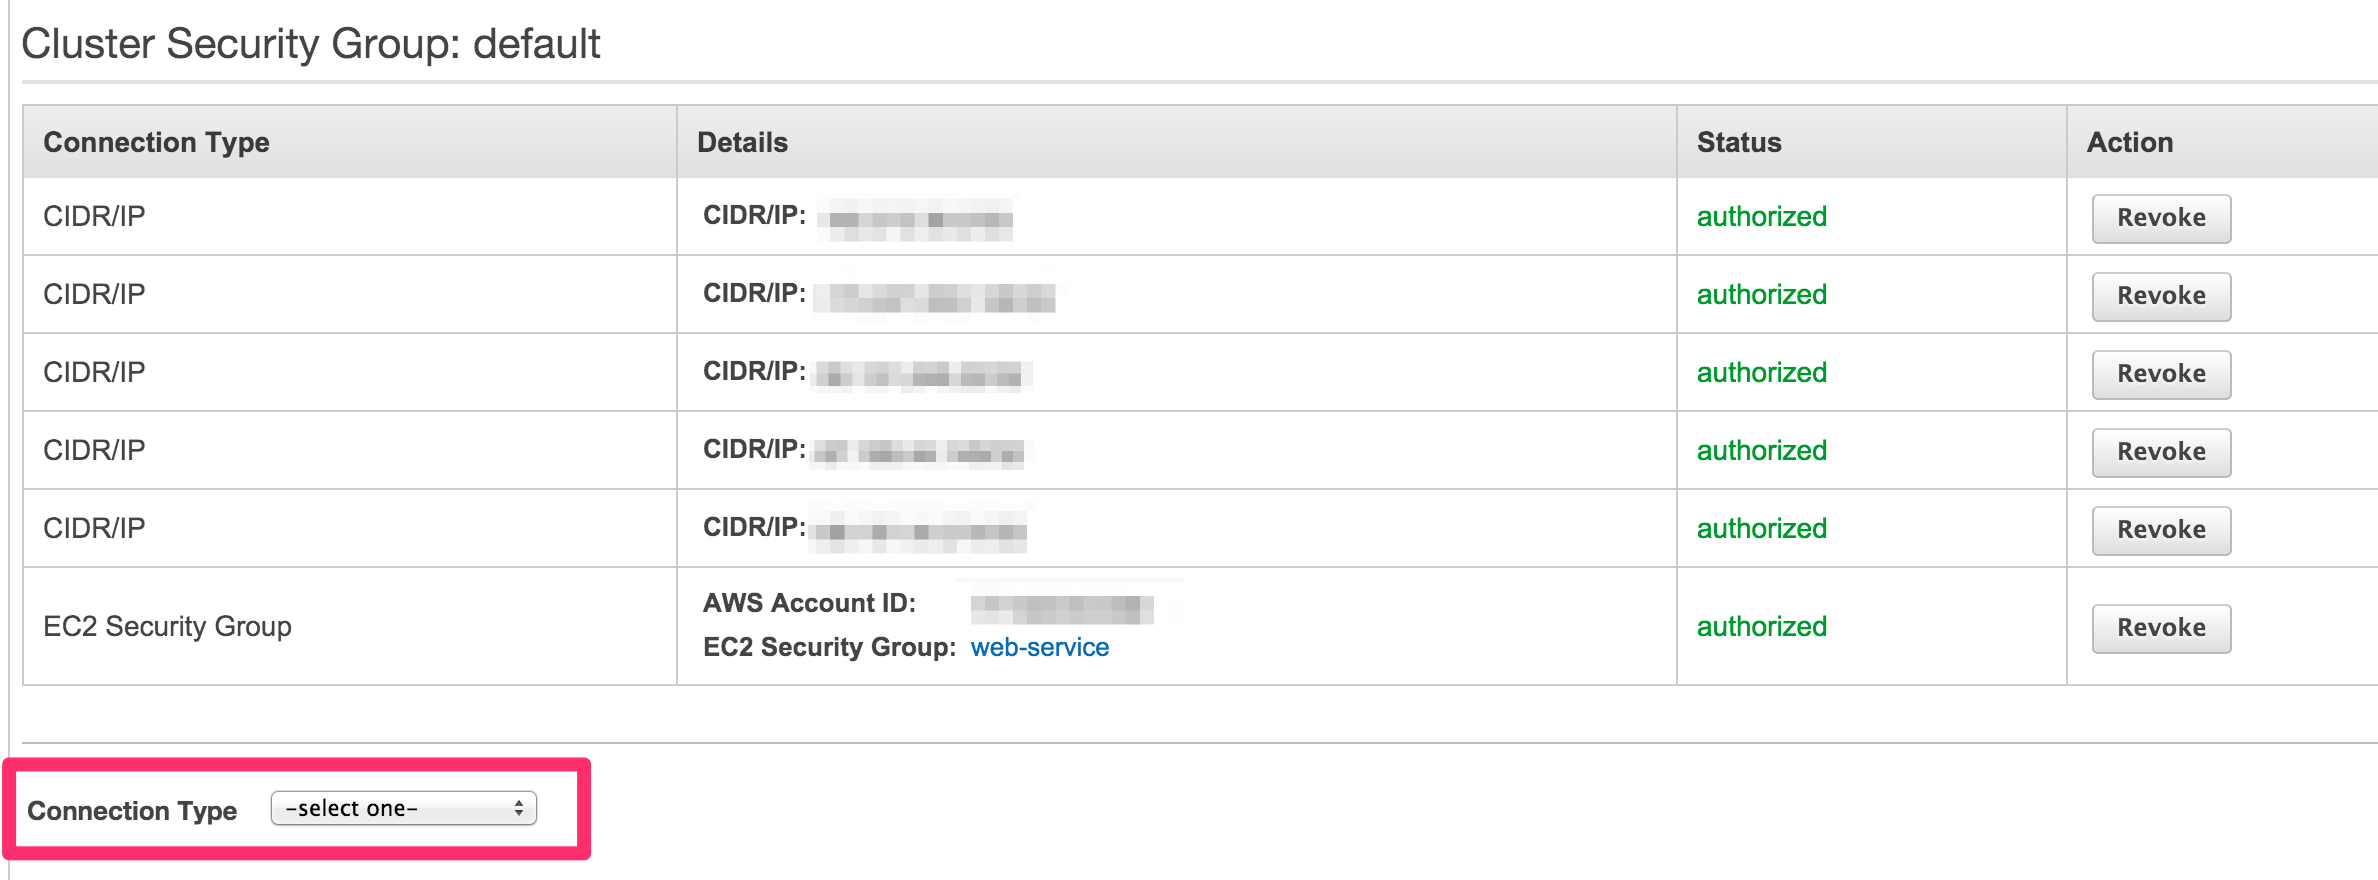
At the bottom of the page, highlight the Connection Type selector and choose CIDR/IP.
-
In the CIDR/IP to Authorize field, paste address:
54.68.30.98/32.
-
Click the blue Authorize button.
-
Repeat steps 1-4 for each of the addresses listed above.