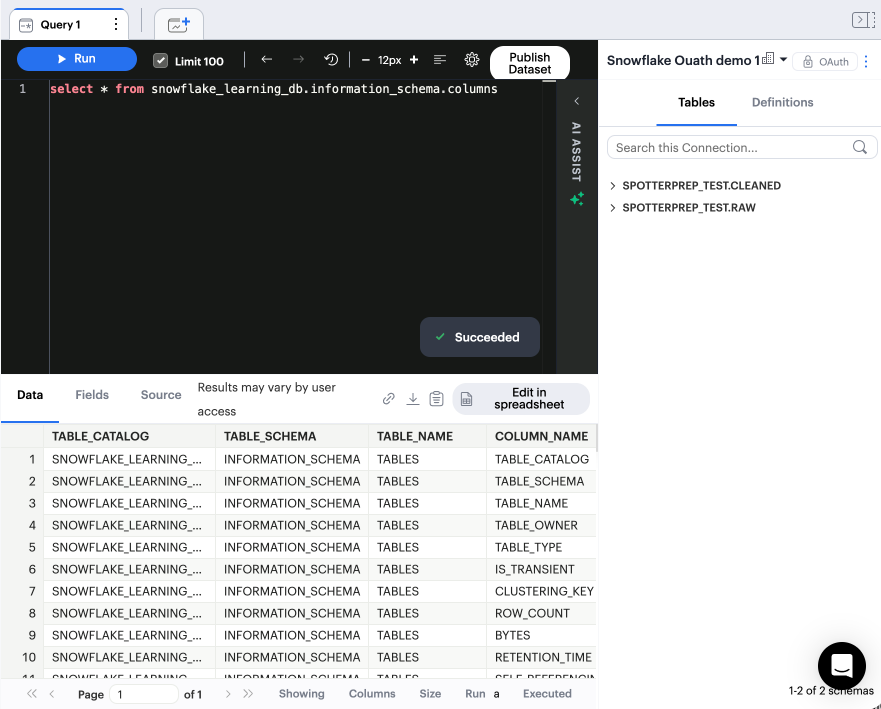
Connect to Snowflake in Analyst Studio
Supported JDBC drivers and known issues
We support the following driver versions:
-
(Recommended) Snowflake v 3.26.0
-
Snowflake v 3.24.2
-
Snowflake v 3.23.2
-
Snowflake v 3.23.1
-
Snowflake v 3.20.0
-
Snowflake v 3.16.0
-
Snowflake v 3.15.0
The following are known issues with the current supported drivers. Analyst Studio continues to advocate on our customers' behalf for vendors and open-source communities to resolve these issues.
| Driver | Known Issue | Further Details |
|---|---|---|
All |
Date functions not displaying correctly |
Date functions like DATE_TRUNC do not work as expected due to Analyst Studio’s results formatter. Workaround is to use a function to convert the date to string. |
Snowflake v 3.13.1 |
Timestamps with timezone are not supported |
Analyst Studio does not display timestamp values with the timezone. Instead, convert all timestamps to one timezone for simplicity. SELECT current_timestamp() AS Date, + cast(convert_timezone('US/Eastern', Date) AS datetime) EST_date;
|
Connecting to Analyst Studio via password
| Snowflake currently blocks single-factor password sign-in, except for service users. We recommend using Key Pair authentication. |
-
Log in to Analyst Studio and follow the steps to connect a database to Analyst Studio.
-
Select Snowflake from the list of databases.
-
Select Authentication method: Password in the Analyst Studio connection form.
-
Enter the Display name, Description (optional), Account URL/Host, Warehouse, Database name, Role (optional), Username, Password, and Preferred JDBC Driver. We recommend selecting Snowflake version 3.26.0 for JDBC Driver, but you can select any version from the dropdown.
-
Click Connect. You will land on a page that displays your database schema.
Connecting to Analyst Studio via key pair authentication
Please follow the Snowflake documentation for configuring key pair authentication. We recommend key pair authentication, as it has no expiry.
Note you can generate a Personal Access Token (PAT) in Snowflake and paste it into the password field for added security. If you use a personal access token, you can configure the password’s lifetime, and rotate it as needed.
-
Generate the private key. There is the option to generate encrypted or unencrypted private keys. Snowflake recommends encrypting with a passphrase to protect the private key.
-
Generate the public key by referencing the private key and assign the public key to the Snowflake user that will be used to access Analyst Studio.
-
Log in to Analyst Studio and follow the steps to connect a database to Analyst Studio.
-
Select Snowflake from the list of databases.
-
Select Authentication method: Key pair in the Analyst Studio connection form.
-
Enter the username of the assigned Snowflake user, upload the private key with a p8 file extension, and include the passphrase if the private key was encrypted.
-
Click Connect. You will land on a page that displays your database schema.
Connecting to Analyst Studio via OAuth
Choose this authentication version when you want to set a connection that requires a client secret. When you connect via OAuth, queries run as the signed-in user, so that user’s Snowflake grants, masking policies, and row access policies apply.
| OAuth is enforced at query execution time only - sharing stays the user’s responsibility. If someone moves a Report out of their personal collection, or publishes a dataset to a Data Workspace, everyone with access sees it regardless of their own Snowflake grants. |
Before you begin
To add a Snowflake connection to ThoughtSpot using internal OAuth, you must set up the OAuth integration in Snowflake. This requires a Snowflake user account with ACCOUNTADMIN permission.
| Each ThoughtSpot instance requires a unique Snowflake security integration. Each user in Snowflake must have a default warehouse and default role. |
In your Snowflake database, do the following:
-
In the Model view, enter the following commands, and select Run:
SHOW USERS;

SHOW SECURITY INTEGRATIONS;

CREATE OR REPLACE SECURITY INTEGRATION <enter a name for your security role>
  TYPE = OAUTH
  OAUTH_CLIENT = CUSTOM
  OAUTH_CLIENT_TYPE = <enter a client type>
  OAUTH_REDIRECT_URI = 'https://<public url of your AS instance>/snowflake_oauth_v1/callback'
  OAUTH_USE_SECONDARY_ROLES = IMPLICIT
  ENABLED = TRUE
  COMMENT = '<enter a description of your security profile>'
-
At the bottom of what you entered in step 1, add an empty line, and then enter the following to describe your security integration:
DESCRIBE SECURITY INTEGRATION <enter description of your security integration>;

SELECT SYSTEM$SHOW_OAUTH_CLIENT_SECRETS('<enter same description of your security integration as previous line');
Example of a full query:
SHOW USERS; SHOW SECURITY INTEGRATIONS; CREATE OR REPLACE SECURITY INTEGRATION OAUTH_CONFIG TYPE = OAUTH OAUTH_CLIENT = CUSTOM OAUTH_CLIENT_TYPE = 'CONFIDENTIAL' OAUTH_REDIRECT_URI = 'https://app.as01.analyststudio.thoughtspot.cloud/snowflake_oauth_v1/callback' OAUTH_USE_SECONDARY_ROLES = IMPLICIT ENABLED = TRUE COMMENT = 'Profile for passthrough' DESCRIBE SECURITY INTEGRATION OAUTH_CONFIG; SELECT SYSTEM$SHOW_OAUTH_CLIENT_SECRETS('OAUTH_CONFIG'); -
Select the Run button to run the full query.
The Details window appears displaying a JSON object.
-
Copy the JSON object and select Done to close the window.
-
Paste the contents into a text editor.
Example:
{"OAUTH_CLIENT_SECRET_2":"KqKBu0xOxPtmk+RKvNP0+eIAMlFxMsu8rRh6s5q1qLY", "OAUTH_CLIENT_SECRET":"KdKBb0aOxPzml+RJvMP1/eIEMlFxM/su6rPh2wLZ", "OAUTH_CLIENT_ID":"aOxPzmlRJvCP5eIUMlFxMbu6rJh7mTO="} -
For OAUTH_CLIENT_ID, copy the information between quotes after the colon (:).
Example:
aOxPzmlRJvCP5eIUMlFxMbu6rJh7mTO=Make sure you include the equals sign (=), if it exists. -
In the Snowflake connection details page in ThoughtSpot, paste the OAuth client ID in the OAuth Client ID field.
-
For OAUTH_CLIENT_SECRET, copy the information between quotes after the colon (:).
Example:
KdKBb0aOxPzml+RJvMP1/eIEMlFxM/su6rPh2wLZ -
In the Snowflake connection details page in ThoughtSpot, paste the OAuth client secret in the OAuth Client Secret field.
Once a connection is created the token associated with the user login credentials for the connection is stored in ThoughtSpot for 90 days.
Connect
-
Log in to Analyst Studio and follow the steps to connect a database to Analyst Studio.
-
Select Snowflake from the list of databases.
-
Select Authentication method: OAuth in the Analyst Studio connection form.
-
Enter the Display name, Description (optional), Account URL/Host, Warehouse, Database name, Role (optional), Snowflake Account Identifier, OAuth Client ID, OAuth Client Secret, and Preferred JDBC Driver. We recommend selecting Snowflake version 3.26.0 for JDBC Driver, but you can select any version from the dropdown.
-
Click Connect. You will be redirected to Snowflake to authorize access.
Connecting to Analyst Studio via OAuth with PKCE
Choose this authentication type when you want to use a public client.
-
Log in to Analyst Studio and follow the steps to connect a database to Analyst Studio.
-
Select Snowflake from the list of databases.
-
Select Authentication method: OAuth with PKCE in the Analyst Studio connection form.
-
Enter the Display name, Description (optional), Account URL/Host, Warehouse, Database name, Role (optional), Snowflake Account Identifier, OAuth Client ID, and Preferred JDBC Driver. We recommend selecting Snowflake version 3.26.0 for JDBC Driver, but you can select any version from the dropdown.
-
Click Connect. You will be redirected to Snowflake to authorize access.
Re-authentication
Users see a prompt to authenticate a connection when using an Internal OAuth connection for the first time, or when the token expires. You must periodically re-authenticate connections to Snowflake made via OAuth and OAuth with PKCE.
To re-authenticate a connection:
-
Click the name of the data source in the data source selector of a report.
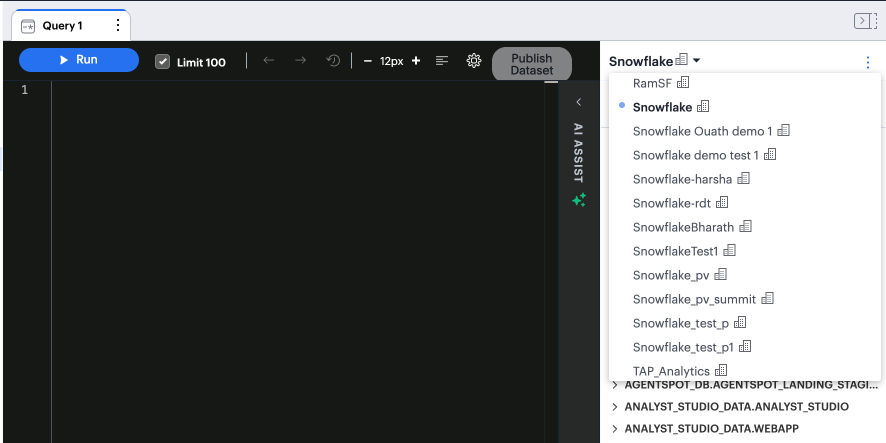
-
The Connect your snowflake account pop-up appears, displaying the account and authentication method. Click Continue to snowflake.
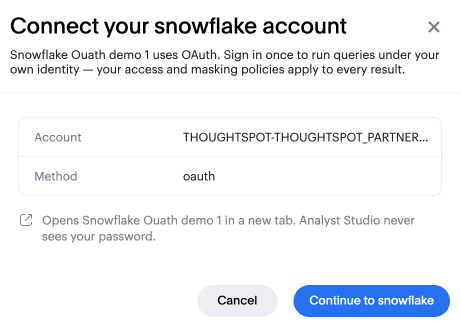
-
You see a sign-in page for Snowflake. Enter your username and password, or select Sign in using SSO.
-
You return to the Report view. Now, when you run a query, the connection functions as normal.