Spotter connector marketplace
The Spotter Connector Marketplace is a browsable catalog of third-party connectors that extend Spotter’s capabilities by connecting it to external tools and services through the Model Context Protocol (MCP).
| This feature and the Can Manage Spotter privilege will be rolled out in the first weekly patch after the 26.10.0.cl release. |
The marketplace has two sections:
-
My added connectors: Connectors already configured on your ThoughtSpot instance.
-
Available to add: A catalog of over 100 pre-configured connector templates that you can browse and add.
All Spotter users can browse the marketplace and see available connectors. Adding and configuring connectors requires administrator privileges or the Can Manage Spotter privilege, and must be done from the primary Org.
If a connector you need is not listed in the catalog, you can connect Spotter to any MCP-compatible server by providing its URL and credentials.
Connector templates and catalog
The Spotter Connector Marketplace offers over 100 pre-configured templates for popular enterprise tools, communication platforms, automation platforms, and developer services. Templates streamline connector setup: ThoughtSpot pre-fills key details, links to provider documentation, and guides you through authentication and permissions.
Some templates support one-click setup (Slack, Web Search), while others require guided steps on the provider’s side (Microsoft Teams, Salesforce, Asana, etc).
Browse the full template catalog in the marketplace. If you don’t see the connector you need, you can add any MCP-compatible service with a custom connector. For a complete list of every connector available in the marketplace, see Spotter connector reference.
|
Templates are the most common connector type in the marketplace. You rarely need to configure a connector from scratch. |
Types of connectors
The marketplace includes connectors with different setup requirements:
| Type | Description | Examples |
|---|---|---|
One-click |
No configuration needed. Click to add instantly. ThoughtSpot maintains tighter integrations with these connectors. |
Slack, Web Search |
Template |
Pre-configured setup. ThoughtSpot provides a template with pre-filled details and a link to the provider’s documentation. You complete provider-side setup, obtain credentials (such as a URL, client ID, and client secret), and then enter them in ThoughtSpot. Templates cover a wide range of enterprise tools and services. |
Microsoft Teams, Salesforce, Asana, Snowflake, Glean, and many more |
Pre-filled URL |
ThoughtSpot pre-fills the MCP server URL. You may need to provide additional credentials or configuration details. Gong and Asana are examples of connectors with pre-filled URLs. |
// TODO: verify with engineering — confirm examples of pre-filled URL connectors |
Custom connector |
For any MCP-compatible service not in the catalog, provide its URL and credentials. You configure from scratch. |
Custom internal APIs, niche platforms |
|
The marketplace does not list every MCP server that Spotter can connect to. If the connector you need is not in the catalog, you can add any MCP-compatible server manually. See [add-custom-mcp-server]. |
User roles and permissions
The Connector Marketplace is visible to all Spotter users, but the actions available depend on your role and your current Org.
Primary Org
| Role | Available actions |
|---|---|
Administrator |
Browse the catalog, add, configure, and edit connectors, share connectors, manage permissions. |
Can Manage Spotter privilege |
Browse the catalog, add, configure, and edit connectors, share connectors, manage permissions. |
End user |
Browse the catalog and view added connectors (view-only). Cannot add, configure, or manage connectors. |
Non-primary Orgs
Connectors can only be added or removed from the primary Org. If you are in a non-primary Org:
-
Administrators and users with Can Manage Spotter: Can browse the catalog, share connectors, and manage permissions. The Add option is not available.
-
End users: Can browse the catalog and view connectors they have access to (view-only).
For details, see [_sharing_a_connector] and Managing connector permissions.
|
The Can Manage Spotter privilege for connector management is available starting with the first patch of 26.10.0.cl. |
Accessing the Connector Marketplace
The Connector Marketplace is available on the Spotter page.
-
Navigate to the Spotter page.
-
Click Settings, then click Connectors.
The marketplace displays your added connectors and the full catalog of connectors available to add.
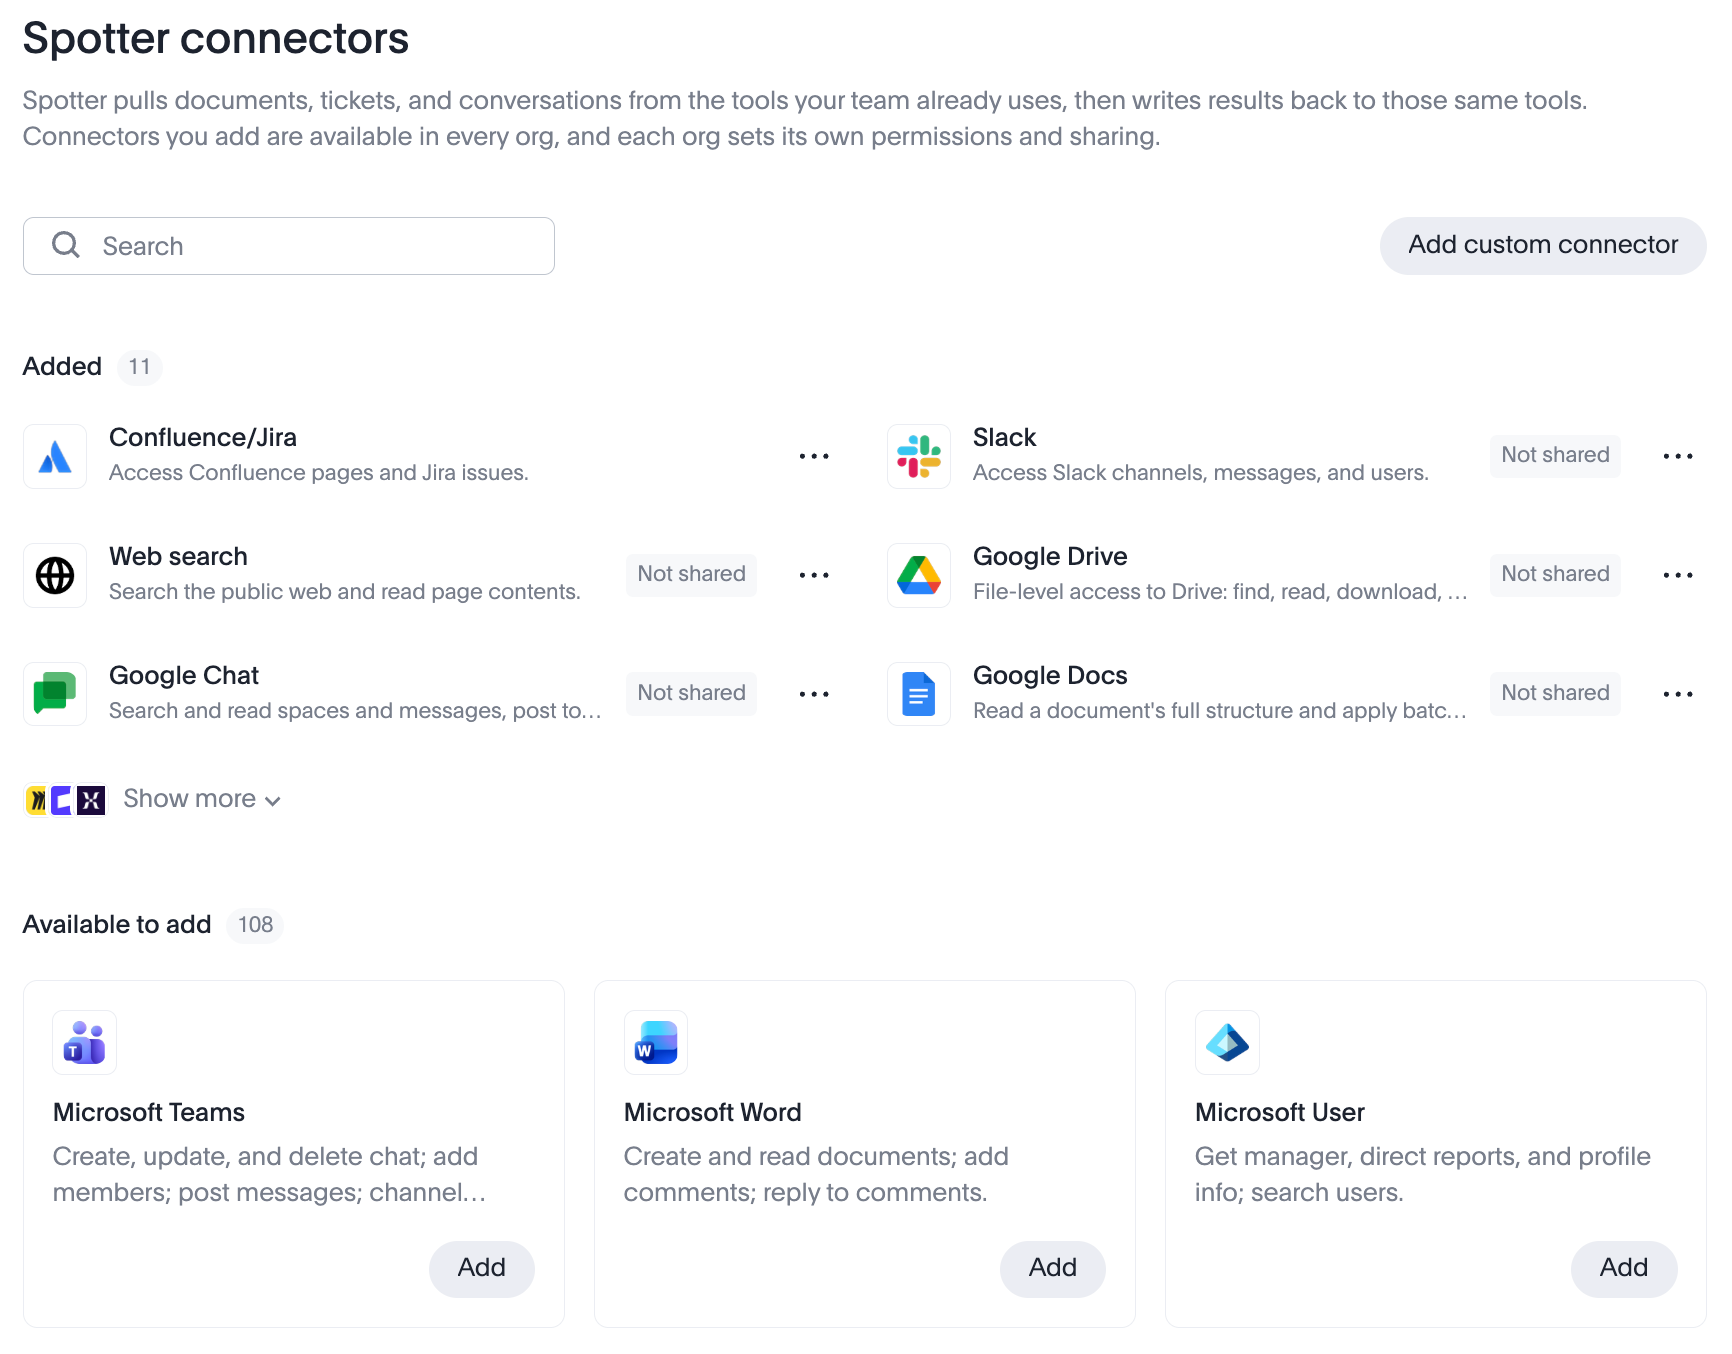
Adding a connector
You must be an administrator or have the Can Manage Spotter privilege, and you must be in the primary Org to add a connector.
Connectors that require setup
Most connectors in the marketplace are pre-configured templates. To add one of these connectors:
-
In the Connector Marketplace, locate the connector in the Available to add section.
-
Click the connector to open its Add connector window.
-
Follow the link at the top of the window to the provider’s documentation and complete any required setup on the provider’s side. This typically involves registering an application and obtaining credentials such as a URL, client ID, and client secret.
-
Return to the Add connector window in ThoughtSpot and enter the required credentials.
-
Click Add to complete the setup.
Some connectors have a known MCP server URL. In these cases, ThoughtSpot pre-fills the URL for you, and you only need to provide authentication credentials.
One-click connectors
Some connectors, such as Slack and Web Search, can be added with a single click and require no additional configuration.
To add a one-click connector:
-
In the Connector Marketplace, locate the connector in the Available to add section.
-
Click Add.
The connector is added immediately and appears in My added connectors.
Adding a custom connector
If the tool or service you need is not listed in the marketplace catalog, you can add it as a custom connector, provided it supports the MCP protocol.
To add a custom connector:
-
In the Connector Marketplace, click Add custom connector.
-
Enter the following:
-
Connector display name
-
Description
-
MCP URL
-
-
Select an Authentication type.
-
Click Add.
|
Adding a custom connector requires administrator privileges or the Can Manage Spotter privilege, and must be done from the primary Org. |
Editing a connector
To edit a connector, you must be an administrator or have the Can Manage Spotter privilege, and you must be in the primary Org.
To edit a connector:
-
In the Connector Marketplace, click the More menu icon
 for the connector and select Edit.
 -
Make your changes.
-
Click Save.
Sharing a connector
When a connector is first added, only admins and users with the Can Manage Spotter privilege can use it. To make it available to others, you must share the connector with them. It will then appear in their Added connectors list in Spotter. Sharing controls which users see the connector and can use its capabilities in Spotter conversations.
Unlike adding connectors, sharing is available in both the primary Org and non-primary Orgs.
To share a connector:
-
In the Connector Marketplace, locate the connector in Added connectors list.
-
Click the More menu icon
for the connector and select Share. -
Select the users or groups you want to share the connector with.
-
Select Share.
The connector now appears in the Added connectors list for the selected users.
Managing connector permissions
Administrators and users with the Can Manage Spotter privilege can manage the permissions of an added connector, in both the primary Org and non-primary Orgs.
To manage permissions for a connector:
-
In the Connector Marketplace, locate the connector in Added connectors.
-
Click the More menu icon
for the connector and select Manage Permissions. -
The Spotter tool permissions window appears, showing tools divided by function: read-only, write/delete, or interactive.
-
Click the dropdown above each section to set permissions for all tools as
Always allow,Needs user approval, orAlways deny. -
Use the toggle next to individual tools to mark them as allowed (checkmark), needs approval (key), or blocked (prohibited symbol). Tools needing user approval prompt for permission during Spotter conversations. Blocked tools are unavailable; Spotter will explain if you attempt to use them.
-
-
Click Save once you’re happy with your selections.
|
In non-primary Orgs, Share and Manage permissions are the only connector management actions available. Connectors can only be added or removed from the primary Org. |
Remove a connector
To remove a connector, you must be an administrator or have the Can Manage Spotter privilege, and you must be in the primary Org.
| When you remove a connector, all users on your ThoughtSpot instance will lose access to it. |
To remove a connector:
-
In the Connector Marketplace, click the More menu icon
for the connector and select Remove. -
In the Remove connector window, click Remove.
What end users see
After the Connector Marketplace is enabled, all Spotter users can access the Spotter connectors page, regardless of their role. End users see:
-
Added: The connectors that have been configured and shared with them.
-
Available to add: The full catalog of available connectors. End users can browse this list to see what connectors exist, but cannot add or configure them.
This visibility helps end users understand what integrations are available and make informed requests to their administrators.